
Introduction to No Knead Seeded Oat Bread
If you’re tired of unhealthy fast food options and looking for a wholesome alternative, no knead seeded oat bread is a game changer. This recipe not only yields a deliciously hearty loaf, but it also allows you to enjoy the benefits of homemade bread with minimal effort. With just a few simple ingredients, you can create a nutritious loaf that makes perfect sandwiches or toast for your morning coffee.
This bread is packed with nutritional goodness thanks to whole rolled oats, healthy seeds, and honey for a touch of sweetness. Unlike fast food bread loaded with preservatives and unhealthy ingredients, baking your own bread means you know exactly what goes into it. Plus, it's a fun project that fills your kitchen with enticing aromas!
You may wonder, “Is it really that easy?” Absolutely! The beauty of the no-knead method lies in its simplicity, perfect for busy professionals who want to embrace healthier habits without spending hours in the kitchen. For a deeper dive into baking with yeast, feel free to check out my Baking with Yeast Guide. You're just a few friendly kitchen steps away from enjoying your own heavenly slice of no knead seeded oat bread.
Essential ingredients for a perfect loaf
Creating a delightful no knead seeded oat bread starts with high-quality ingredients. Here’s a roundup of what you’ll need for that perfectly hearty loaf:
- 3 cups (390g) bread flour: This gives the bread its chewy texture. Be sure to measure it correctly—spooned and leveled!
- 2 teaspoons (about 6g) instant yeast: I recommend using Platinum Yeast from Red Star for reliable results.
- 1 cup (85g) old-fashioned whole rolled oats: These not only provide fiber but also create a lovely nutty flavor.
- Pumpkin and sunflower seeds: ¼ cup each brings crunch and nutrition.
- 2 tablespoons flax or sesame seeds: A fantastic source of omega-3s and adds texture.
- 2 teaspoons coarse salt: Enhances flavor—don't skip!
- 2 tablespoons honey: Adds a touch of natural sweetness that balances the hearty ingredients.
- 1 and ½ cups (360ml) warm water: Essential for activating the yeast.
Optional items to enhance flavor
While the essential ingredients will yield a fantastic loaf, a few simple additions can elevate your no knead seeded oat bread:
- Cornmeal for dusting: This will give your loaf a great texture on the bottom and help prevent sticking.
- Extra seeds for topping: Consider sprinkling some more oats, pumpkin, or sunflower seeds on top before baking for an appealing finish.
Feel free to experiment by mixing in other seeds or grains you love! Check out King Arthur Baking for great ideas on variations. Happy baking!
Step-by-step Preparation of No Knead Seeded Oat Bread
Gather your ingredients
Before we dive in, it's essential to have everything you need on hand. For this recipe, you’ll need:
- 3 cups (390g) bread flour
- 2 teaspoons (about 6g) instant yeast
- 1 cup (85g) old-fashioned whole rolled oats
- ¼ cup (30g) pumpkin seeds
- ¼ cup (30g) sunflower seeds
- 2 tablespoons (18g) flax seeds or sesame seeds
- 2 teaspoons coarse salt
- 2 tablespoons (43g) honey
- 1 and ½ cups (360ml) warm water (around 95°F or 35°C)
Make sure to also grab cornmeal for dusting your pan if you have it!
Mix dry ingredients
In a large bowl, whisk together the bread flour and instant yeast. Add the old-fashioned oats, pumpkin seeds, sunflower seeds, flax seeds, and coarse salt, mixing them well together. This blend of dry ingredients sets the foundation for the heartiness of your no knead seeded oat bread.
Combine wet ingredients
In a separate bowl, mix the honey and warm water until combined. Pour this mixture over your dry ingredients and stir gently with a silicone spatula or wooden spoon. The resulting dough will be quite sticky, which is perfectly normal and part of the charm of no-knead recipes.
Form the dough
Shape the sticky dough into a ball within the bowl. Don’t worry if it’s not perfect—it can be a bit shaggy!
Allow for the first rise
Cover the bowl tightly with plastic wrap or aluminum foil and leave it at room temperature for about three hours. You'll know it's ready when the dough has roughly doubled in size and has a beautifully bubbly surface.
Refrigerate for best flavor
While you could bake it straight away, letting your dough rest in the fridge for at least 12 hours will deepen its flavor significantly. You can refrigerate it for up to three days if you need to.
Shape the loaf
Dust a large nonstick baking sheet with flour (or cornmeal) and gently transfer the risen dough onto it. With floured hands, form the dough into a round loaf without deflating it too much.
Second rise
Cover the shaped loaf loosely with a kitchen towel and let it rest for about 45 minutes. This is a great time to preheat your oven to 425°F (218°C).
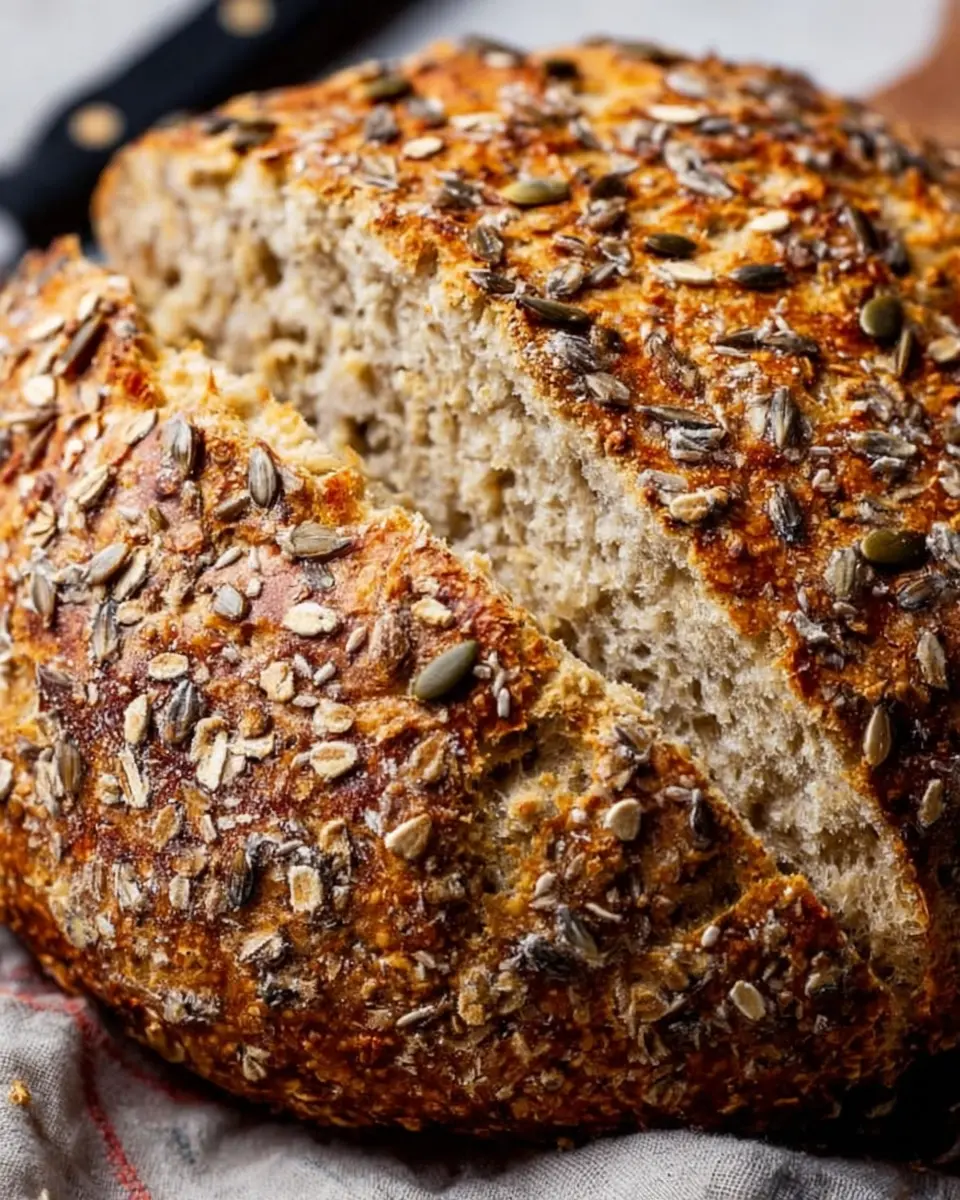
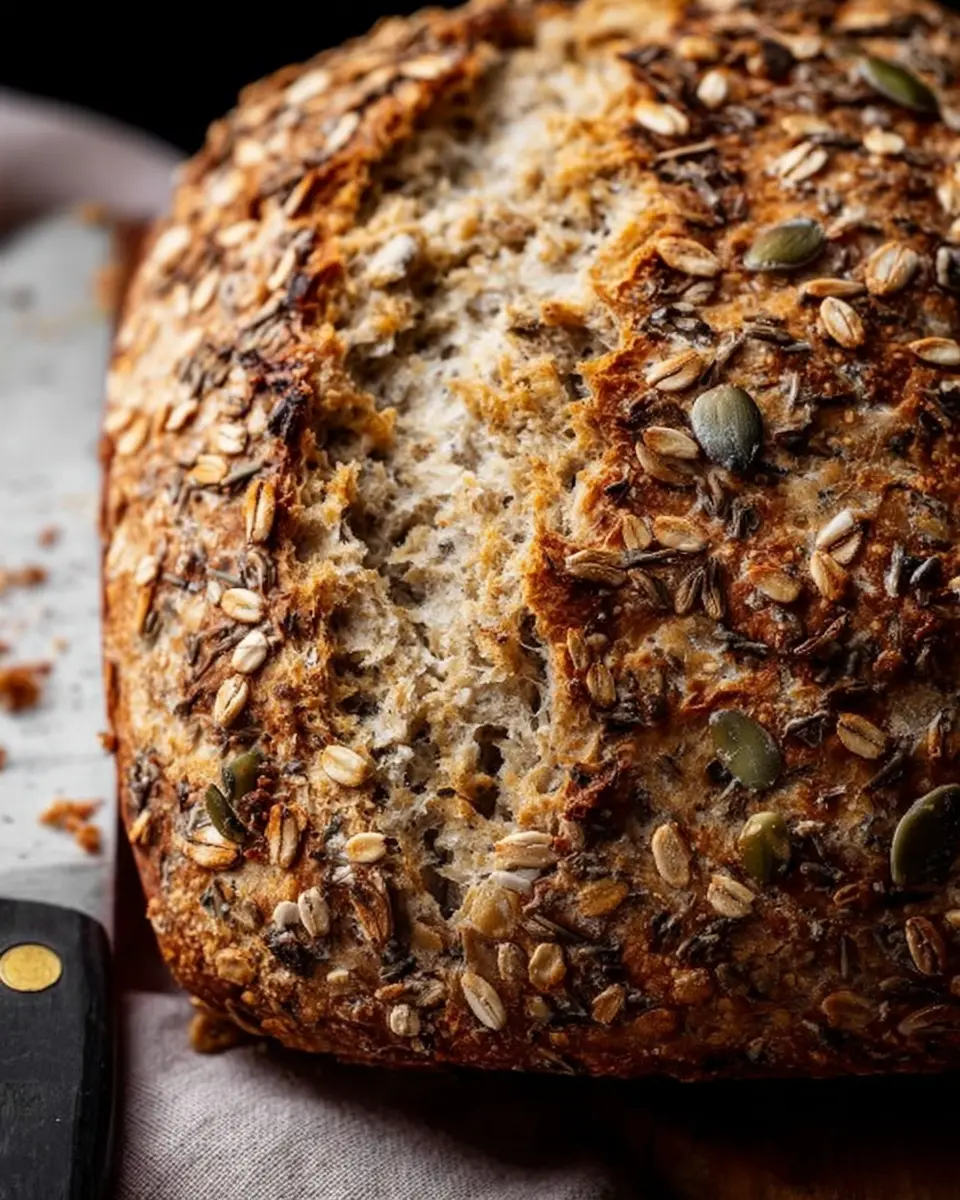
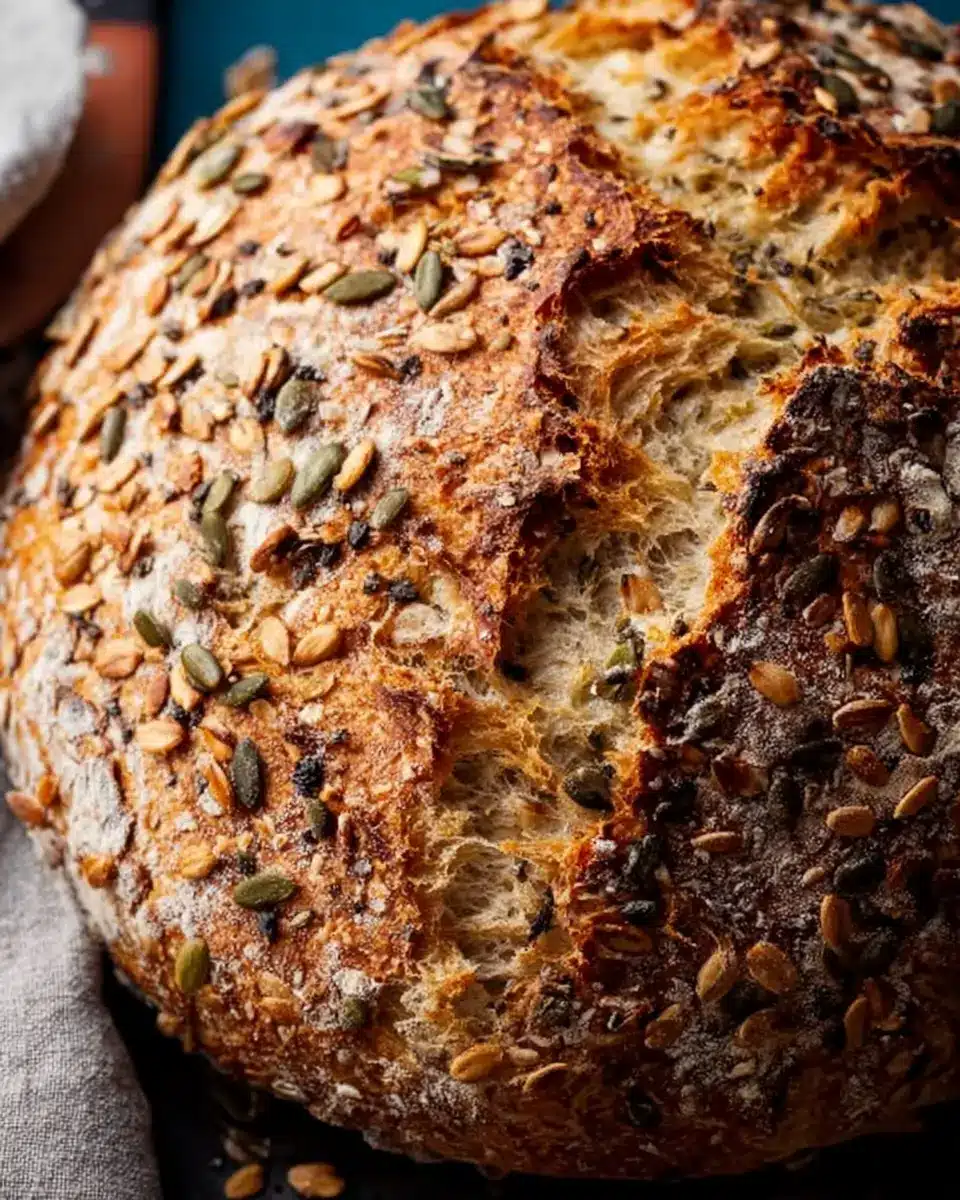
Score and bake the bread
Before transferring it to the oven, score the top of your loaf with a sharp knife to allow it to expand while baking. This will help create that perfect artisan look and texture we’re all aiming for.
Then, bake it for about 40 minutes until golden brown and crusty. Remember, a hollow sound when tapping on the crust is a sign your bread is done! Let it cool before slicing, and enjoy your gorgeous creation!
With this step-by-step guide, you’ll have a delightful no knead seeded oat bread perfect for toasting, sandwiches, or simply enjoying on its own. Happy baking!
Variations on No Knead Seeded Oat Bread
Experiment with Different Seeds
One of the joy-filled aspects of making no knead seeded oat bread is its flexibility. Feel free to swap in your favorite seeds based on what you have on hand or your personal preferences. Want a nutty flavor? Try adding chia seeds, hemp hearts, or poppy seeds. You can also use a blend of seeds to create a unique flavor profile, making each loaf an exciting surprise!
Try Adding Herbs or Spices
For an extra layer of flavor, consider incorporating dried herbs or spices into your no knead seeded oat bread. Rosemary, thyme, and oregano can elevate the taste, working beautifully alongside the seeds. You could even sprinkle some garlic powder or a dash of cinnamon for a slightly sweet twist. What’s your favorite herb that would pair nicely? This bread can easily become a customizable canvas for your culinary creativity!
Cooking Tips and Notes for No Knead Seeded Oat Bread
Troubleshooting Common Dough Issues
If your no knead seeded oat bread dough seems too dry, consider adding a splash more water—just a tablespoon at a time. Conversely, if it’s overly sticky, sprinkle in a bit more flour until the consistency feels right. Remember, every kitchen environment is different! For a deeper dive into working with yeast, check out Sally's Baking with Yeast Guide for additional tips.
Best Practices for Storing Leftovers
To keep your freshly baked bread at its best, store it loosely covered at room temperature for up to three days. For longer storage, wrap it well in aluminum foil and place it in the fridge for up to ten days. If you’re not planning to devour it right away, freezing is your friend—just make sure to slice it first! Thaw at room temperature when you're ready to enjoy that delicious loaf again.
Serving Suggestions for No Knead Seeded Oat Bread
Delicious pairings for your homemade bread
Nothing beats the satisfaction of fresh no knead seeded oat bread right out of the oven. It pairs wonderfully with:
- Avocado: Smash it into a creamy spread topped with salt and pepper for a nutritious breakfast.
- Turkey Bacon: Layer it in a sandwich for a delicious protein boost.
- Chicken Ham: This makes for a savory lunch option when complemented with fresh greens.
- Salads: Serve slices alongside a crisp garden salad to soak up flavors.
Creative spreads and toppings
Get adventurous with your spreads! A few favorites include:
- Hummus: A flavorful dip with rich textures.
- Cream Cheese: Mix in herbs or garlic for a zingy twist.
- Nut Butters: Try almond or peanut butter, topped with banana slices for a quick snack.
- Pesto: Spread under a thick layer of cheese for a gourmet melted delight.
Experiment with these options, and you'll discover how versatile your no knead seeded oat bread can be! Looking for more ideas? Check out popular food blogging sites like Serious Eats for creative combinations.
Time Breakdown for No Knead Seeded Oat Bread
Preparation Time
Getting started on your no knead seeded oat bread is quick! You’ll spend about 4 hours on preparation, which includes mixing the dough and letting it rise. It’s mostly hands-off time while you wait for that delicious dough to work its magic.
Rising Time
The dough needs about 3 hours to rise at room temperature, allowing it to double in size. For the best flavor, consider letting it rest in the fridge for up to 3 days. This extra time enhances the texture, making your bread even more delightful!
Baking Time
Bake your lovely dough for 40 minutes at 425°F (218°C). Keep an eye out for that golden-brown crust—an excellent indicator that your bread is ready to impress!
Total Time
From start to finish, your no knead seeded oat bread will take around 5 hours (including rising and cooling). Perfect for a lazy weekend or when you're home and want to indulge in the tempting aroma of freshly baked bread.
If you're curious about working with yeast, check out Baking with Yeast Guide for expert tips.
Nutritional Facts for No Knead Seeded Oat Bread
Calories and Nutritional Breakdown
Each slice of no knead seeded oat bread packs approximately 120-150 calories. It boasts a delightful mix of macronutrients with around 4 grams of protein, 2 grams of fat (mostly from healthy seeds), and 22 grams of carbohydrates. You'll also find generous amounts of fiber thanks to the oats and seeds, making it a filling option.
Health Benefits of Main Ingredients
This no knead seeded oat bread is more than just tasty—its ingredients are powerhouses of nutrition:
-
Oats are loaded with soluble fiber, which can improve heart health and stabilize blood sugar levels. Consider reading more about the benefits of oats on Healthline.
-
Pumpkin seeds (pepitas) are rich in magnesium, iron, and zinc, which support immune function and energy levels.
-
Flax seeds contribute omega-3 fatty acids, known for their anti-inflammatory properties. The Mayo Clinic highlights their role in heart health.
This bread is not just a delight to your taste buds but also a step towards a healthier lifestyle!
FAQs about No Knead Seeded Oat Bread
How can I tell when my bread is done?
Knowing when your no knead seeded oat bread is perfect can be tricky! A good method is to tap the bottom of the loaf; it should sound hollow. If you want to be extra certain, use an instant-read thermometer—the internal temperature should read about 195°F (90°C) when done. This ensures you've achieved that lovely golden crust and moist interior we all crave.
Can I freeze no knead bread?
Absolutely! Freezing no knead bread is a great way to enjoy it later. Once it’s completely cooled, wrap it tightly in plastic wrap and store it in a freezer-safe bag for up to three months. When you're ready to enjoy, simply thaw it in the refrigerator overnight or at room temperature for a few hours.
What if my dough is too sticky?
If sticky dough is giving you trouble, don’t worry—a little flour goes a long way. Dust your hands and the work surface with flour as needed, and gently fold in extra flour until the dough is manageable. Remember, bread-making is an art, and each batch behaves a bit differently! For more tips, check out helpful resources like King Arthur Baking for insight on dough texture.
Conclusion on No Knead Seeded Oat Bread
Making homemade bread, especially no knead seeded oat bread, is a rewarding experience. The aroma of freshly baked bread fills your home, and the taste is far superior to store-bought loaves. Plus, you have control over the ingredients, making it a healthier choice. Enjoy every slice!
Why Homemade Bread is Worth the Effort
Homemade bread offers countless benefits that simply can't be matched by store-bought varieties. Here’s why putting in the effort is truly worthwhile:
-
Freshness and Flavor: There's nothing quite like the taste of freshly baked bread. Making no knead seeded oat bread at home ensures it’s warm and flavorful.
-
Healthier Ingredients: You can choose quality ingredients that suit your dietary preferences. By avoiding preservatives and additives commonly found in supermarket bread, you can enjoy a healthier option.
-
Cost-Effective: Baking your own bread can save you money in the long run. Well-made loaves often have a low cost per serving, especially when compared to artisanal bread from bakeries.
-
Fulfillment and Satisfaction: The process of creating something delicious with your own hands is incredibly fulfilling. You’ll be amazed at how a simple mixture of flour, water, and seeds can transform into something so heartwarming.
-
Customizable Recipes: Have fun experimenting! You can add in your favorite seeds, grains, or spices, making each loaf uniquely yours.
For more tips on bread making, check out resources like the King Arthur Baking Company or The Perfect Loaf for inspiration. Happy baking!

No Knead Seeded Oat Bread
Equipment
- mixing bowl
- baking sheet
- silicone spatula
- sharp knife
- measuring cups
- Plastic wrap
Ingredients
Dry Ingredients
- 3 cups bread flour (spooned & leveled)
- 2 teaspoons Platinum Yeast from Red Star instant yeast
- 1 cup old-fashioned whole rolled oats
- ¼ cup pumpkin seeds (pepitas)
- ¼ cup sunflower seeds
- 2 Tablespoons flax seeds or sesame seeds
- 2 teaspoons coarse salt
Wet Ingredients
- 2 Tablespoons honey
- 1.5 cups warm water (about 95°F (35°C))
Topping
- 1 Tablespoon old-fashioned whole rolled oats
- 1 Tablespoon pumpkin seeds (pepitas)
- 1 Tablespoon sunflower seeds
- 1 teaspoon flax seeds or sesame seeds
Optional
- cornmeal for dusting pan
Instructions
Preparation
- Watch the video before you begin, and let that be your visual guide for this recipe.
- In a large un-greased mixing bowl, whisk the flour and yeast together. Add the oats, pumpkin seeds, sunflower seeds, flax seeds, and salt and whisk to combine.
- Mix the honey and water together, and then pour over the dry ingredients. Using a silicone spatula or wooden spoon, gently mix together until all the flour is moistened.
- Cover the dough tightly with plastic wrap or aluminum foil and set on the counter at room temperature. Allow to rise for 3 hours.
- For best flavor and texture, let the risen dough rest in the refrigerator for at least 12 hours.
- Lightly dust a nonstick baking sheet with flour or cornmeal. Shape the risen dough into a ball.
- Transfer the ball to the prepared baking sheet and sprinkle topping ingredients on top of the dough.
- Loosely cover and allow dough to rest for 45 minutes. Preheat the oven to 425°F (218°C).
- Score the dough with a slash or X about ½ inch deep.
- Place the shaped and scored dough in the preheated oven on the center rack.
- Optional: Place a shallow baking pan on the bottom oven rack and pour 3–4 cups of boiling water into it.
- Bake for 40 minutes or until the crust is golden brown. Allow to cool for 10-20 minutes before slicing.
- Store leftovers loosely covered at room temperature for up to 3 days or in the refrigerator for up to 10 days.


Leave a Reply