
Introduction to Pie Crust Recipe
Discovering the Joy of Homemade Pie Crusts
There's something truly magical about a homemade pie crust. If you’ve ever enjoyed a warm slice of pie, you know that a flaky, buttery crust can elevate any filling, whether it’s apples, pumpkin, or even a savory blend. Making your own pie crust is not just about the end product; it's about the process and the satisfaction that comes with it.
Imagine the aroma of butter and flour blending together as you roll out the dough. With just a few simple ingredients — all-purpose flour, butter, and a touch of sugar and salt — you can create a mouthwatering base for your favorite pie. Techniques can vary, but whether you're using a food processor or getting down and dirty with your hands, the result is the same: an incredibly satisfying, homemade crust.
Why not dive deeper into the art of pie making? Check out America's Test Kitchen for expert tips. They emphasize the importance of keeping your ingredients cold to achieve that perfect texture. So, ready to roll up your sleeves and uncover the secrets of a fantastic pie crust recipe? Let’s get started!
Ingredients for Perfect Pie Crust
Creating a delectable pie starts with the right ingredients. Understanding each component can elevate your pie crust recipe and ensure a flaky, buttery result.
Essential ingredients for a flaky pie crust
- All-purpose flour: The backbone of your crust, providing structure. Measure carefully, as too much can lead to a tough texture.
- Cold unsalted butter: Using two sticks of chilled, diced butter creates that coveted flakiness. The cold temperature ensures the butter doesn't melt into the flour prematurely.
- Granulated sugar: A small amount adds a hint of sweetness, balancing flavors beautifully.
- Sea salt: This enhances all the other flavors, it’s essential for more than just seasoning!
Variations and substitutions for a tailored touch
Feel free to experiment! For a nutty flavor, try substituting a portion of the all-purpose flour with almond flour. Want a sweet twist? You can use brown sugar instead of granulated for a deeper flavor profile. Even adding a splash of vanilla extract can create interesting nuances in your pie crust recipe.
For more tips on pie crust variations and techniques, check out King Arthur Baking for even more delicious ideas!
Step-by-Step Preparation of Pie Crust
Making a homemade pie crust might feel daunting, but with a little guidance, you'll see it's a breeze. Follow these step-by-step instructions to prepare a delicious pie crust for your next baking adventure!
Gather Your Tools and Ingredients
Before diving into your pie crust recipe, it’s crucial to gather all your tools and ingredients. Here’s what you need:
- Tools: Food processor, mixing bowl, measuring cups and spoons, pastry blender (optional), plastic wrap, and a rolling pin.
- Ingredients:
- 2 ½ cups all-purpose flour
- ½ tablespoon granulated sugar
- ½ teaspoon sea salt
- ½ pound COLD unsalted butter (2 sticks), diced
- 7–8 tablespoons ice water
Having everything ready will help streamline the process and make it even more enjoyable.
Mix the Dry Ingredients for Your Crust
Start by adding your dry ingredients to the bowl of the food processor. This includes the flour, sugar, and salt. Pulse the mixture a few times to ensure everything is well combined. If you prefer a more hands-on approach, you can use a pastry blender instead. As an addition, according to the King Arthur Baking Company, proper ingredient ratios in baking are essential for a successful outcome, so make sure to measure your flour accurately!
Incorporate the Cold Butter
Next, it’s time to add the cold diced butter into your flour mixture. Pulse the ingredients until they form coarse crumbs, some pea-sized pieces should remain. This is vital for ensuring you have a flaky texture, as the butter will create little pockets of steam while baking.
Add the Ice Water
Now, be ready for a bit of magic! Gradually add 7 tablespoons of ice water, pulsing the mixture just until you start to see moist clumps forming. Press a piece of dough between your fingertips; if it holds together, you’re in great shape. If it’s still crumbly, add more water, one teaspoon at a time. Remember, the key is to avoid overmixing to keep that crust tender.
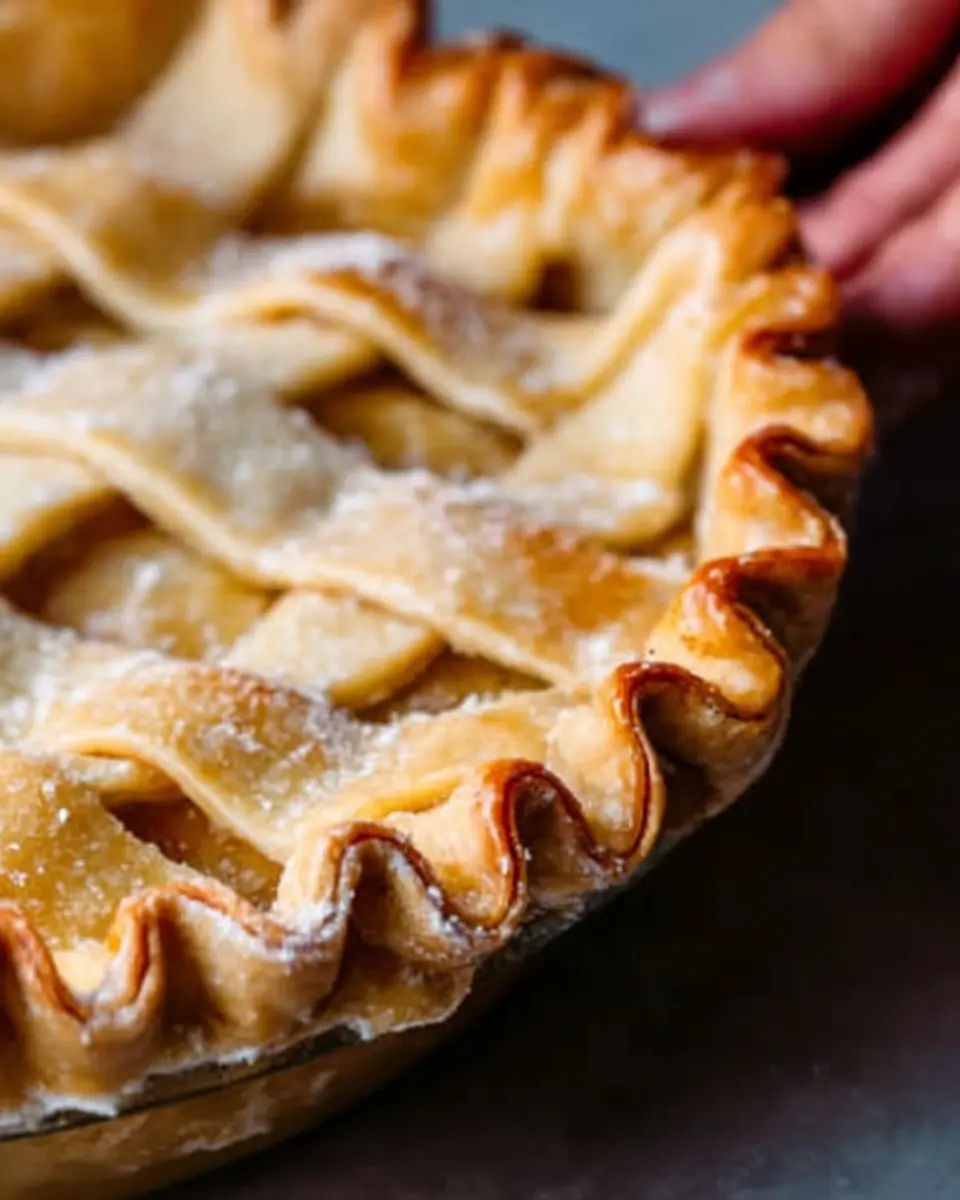
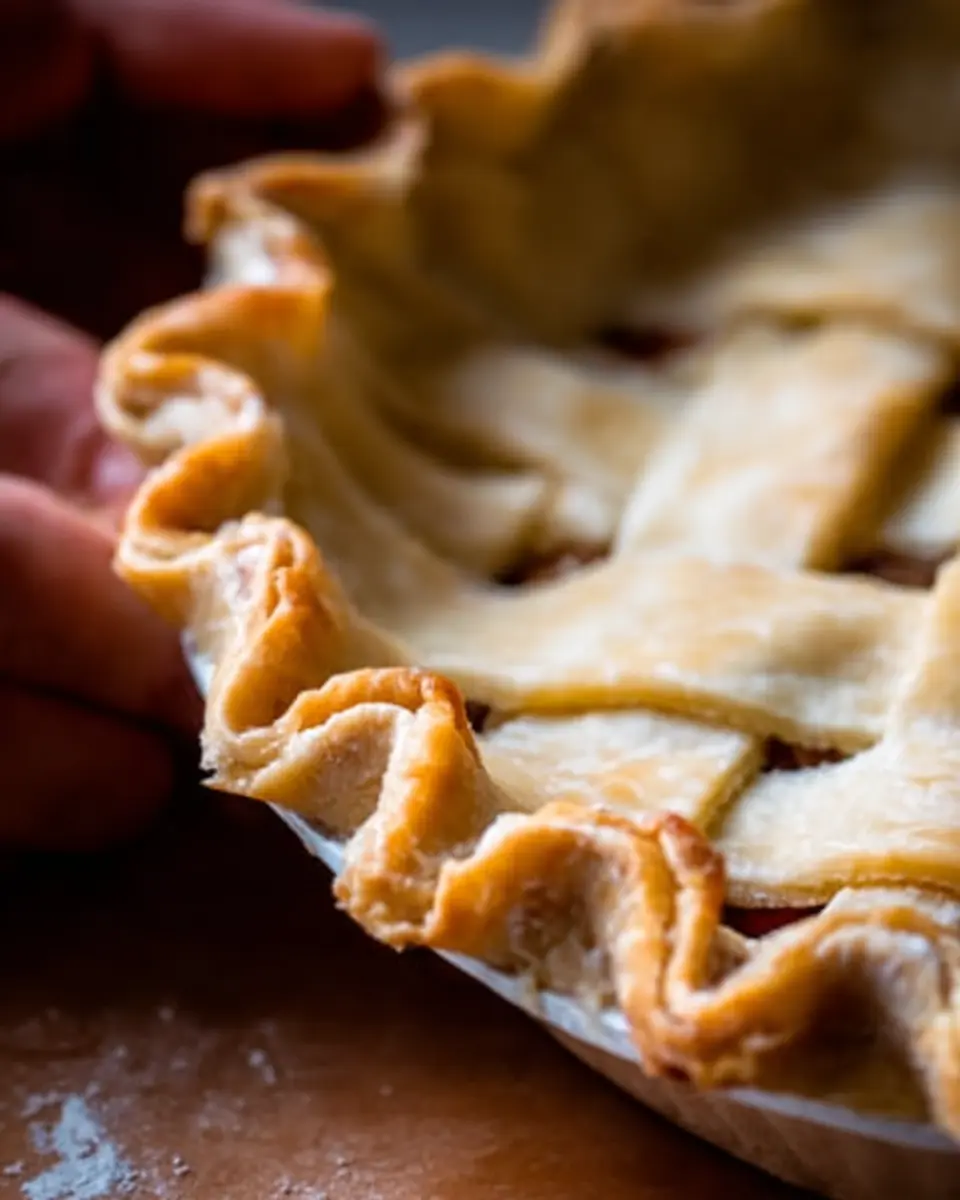
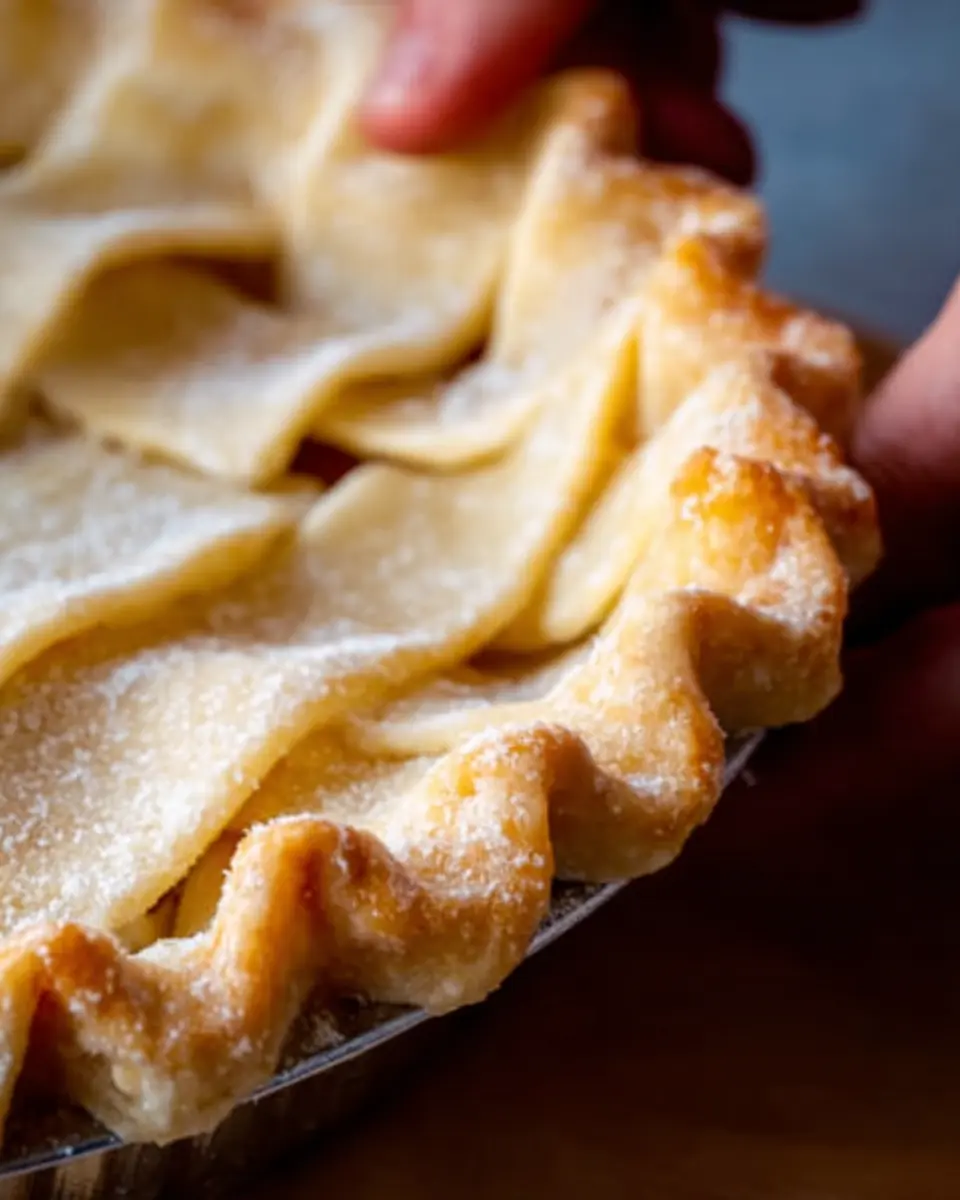
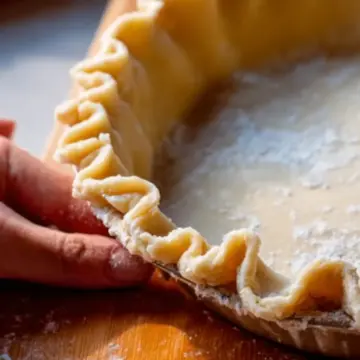
Form the Dough and Chill
Once your dough comes together, transfer it to a clean surface. Gather it into a ball, folding it over itself just enough so it holds without becoming smooth. Then, divide the dough in half and flatten each section into a disk. Wrap each disk in plastic wrap and refrigerate for about an hour. This chilling period is crucial for the butter to firm up, which will contribute to that sought-after flakiness once baked.
And voilà! You now have a beautifully prepared pie crust base ready for your favorite fillings. Whether you’re making a classic apple pie or a savory quiche, feel confident in your homemade creation!
Variations on Basic Pie Crust
Whole Wheat Pie Crust
For a wholesome twist, consider using whole wheat flour instead of all-purpose. This whole wheat pie crust adds a nutty flavor and a bit more substance, making it perfect for savory tarts or rustic fruit pies. Simply replace half of the all-purpose flour with whole wheat flour in the recipe above, and adjust the water slightly, as whole wheat flour absorbs more moisture. This option not only enhances the texture but also provides added nutrients.
Gluten-Free Pie Crust Options
If you’re looking for a gluten-free option, substituting a gluten-free all-purpose flour blend works wonders. Make sure your blend contains xanthan gum, which helps mimic the elasticity typically provided by gluten. For a gluten-free pie crust recipe, you can also opt for almond flour or coconut flour. Mix equal parts with tapioca starch for a lighter texture, and add a bit more butter to maintain that delicious flakiness!
With these variations, you can adapt your pie crust recipe to fit your dietary needs while still enjoying delectable pies. Want to explore more pie crust tips? Check out King Arthur Baking’s guide for additional insights!
Cooking Tips and Notes for Pie Crust
Avoiding Common Pitfalls in Pie Crust Making
Making a perfect pie crust recipe can be tricky, but avoiding common mistakes can set you up for success. One of the biggest errors is over-mixing the dough; remember, a little crumbly is just fine! Also, make sure your butter is really cold—this is key for that sought-after flakiness. Don’t forget to chill the dough for at least an hour before rolling it out; this allows the gluten to relax and prevents shrinkage during baking.
Tips for Achieving That Flaky Texture
To achieve a wonderfully flaky crust, use a light hand when mixing in the butter. Aim for pea-sized chunks (some pieces slightly larger) to create those beautiful layers as they bake. Additionally, consider using a mix of all-purpose flour and a bit of pastry flour if you’re feeling adventurous; the added protein can enhance the texture. Lastly, dust your work surface and rolling pin with flour as needed, ensuring the dough doesn’t stick. For expert tips, check out Serious Eats.
Serving Suggestions for Your Pie
Pairing Your Pie Crust with Fillings
The beauty of this pie crust recipe lies in its versatility. Whether you’re craving a sweet or savory creation, it can accommodate a variety of fillings:
- Fruit Fillings: Classic apple or mixed berry pies bring out the buttery flavor of the crust beautifully.
- Creamy Custards: Lemon or chocolate cream pies are perfect for those with a sweet tooth.
- Savory Options: Think chicken ham or beef pot pies for a heartier meal.
The goal is to let the crust complement the filling, enhancing the overall flavor experience.
Creative Ways to Showcase Your Pie Creations
Let’s be real, presentation matters! Sprucing up your pie not only looks great but invites everyone to dig in:
- Crust Designs: Use cookie cutters to make seasonal shapes with leftover dough.
- Toppings: Brush with an egg wash for a golden-brown finish or sprinkle with coarse sugar for a sparkly touch.
- Serving Style: Serve warm with a scoop of vanilla ice cream or a dollop of whipped cream to elevate the dessert.
Decorating your pie not only showcases your culinary skills but also makes it a centerpiece at gatherings. It’s all about creativity and inviting flavor variation! If you’re looking for additional ideas, check out pastry-focused blogs or websites for inspiration.
Time Breakdown for Pie Crust
Preparation Time
This pie crust recipe requires just 10 minutes of prep time. That’s all it takes to gather your ingredients and mix everything together.
Chilling Time
Once you've formed the dough, it’s important to refrigerate it for 1 hour. This chilling period is vital for achieving that flaky texture we all love.
Total Time
In total, you're looking at 1 hour and 10 minutes from start to finish. Perfect for a cozy baking session before serving up your favorite pie!
For more tips on mastering pie crust, consider checking out this guide on baking fundamentals. Happy baking!
Nutritional Facts for Pie Crust
Calories per serving
A serving of this homemade pie crust recipe contains approximately 232 calories. This makes it a delicious treat that fits well into an indulgent dessert without going overboard.
Key nutrients found in pie crust
Beyond the calories, this flaky crust offers some important nutrients:
- Carbohydrates: The primary source of energy, thanks to the all-purpose flour.
- Fats: The butter in the crust provides essential fatty acids, which are important for nutrient absorption.
- Protein: The small amount of protein in flour helps to nourish the body, especially when paired with a filling.
For further reading on the nutritional components of your favorite baking ingredients, check out resources like Healthline or WebMD.
FAQs about Pie Crust
How can I make my pie crust flaky?
To achieve that perfect flaky texture in your pie crust, the key is to keep your ingredients cold. Use cold butter and ice water as specified in the recipe. When mixing, stop as soon as you see pea-sized butter pieces. This helps create those flaky layers when baked! Additionally, avoid overworking the dough; a gentle touch goes a long way.
What is the best way to store pie crust?
If you’re not using your pie crust right away, you can wrap it tightly in plastic wrap and store it in the fridge for up to three days. For longer storage, consider placing it in an airtight container or a resealable plastic bag. The dough can also be kept in the freezer for up to three months, which makes it perfect for meal prep!
Can I freeze pie crust for later use?
Absolutely! Freezing your pie crust is a great way to save time on future baking projects. Just make sure to wrap it well in plastic wrap and then place it in a freezer bag to prevent freezer burn. When you're ready to use it, simply let it thaw in the fridge overnight before rolling it out.
For more tips on baking, check out resources from the American Pie Council.
Conclusion on Pie Crust Recipe
Creating your own pie crust is a rewarding endeavor. The beauty of homemade pie crusts lies in their flakiness and rich buttery flavor, offering countless possibilities for delicious fillings. With this easy pie crust recipe, you can confidently whip up desserts that showcase your culinary skills. Enjoy the process and savor the results!
Pie Crust Recipe
Equipment
- Food Processor
- mixing bowl
- Plastic wrap
Ingredients
- 2.5 cups all-purpose flour measured correctly
- 0.5 tablespoon granulated sugar
- 0.5 teaspoon sea salt
- 0.5 lb COLD unsalted butter (2 sticks) diced into ¼" pieces
- 7 tablespoon ice water (7 to 8 Tbsp)
Instructions
- Place flour, sugar and salt into the bowl of a food processor and pulse a few times to combine.
- Add cold diced butter and pulse the mixture until coarse crumbs form with some pea-sized pieces then stop mixing.
- Add 7 tablespoon ice water and pulse just until moist clumps or small balls form.
- Transfer dough to a clean work surface, gather into a ball, and fold/knead it enough to hold together.
- Divide dough in half and flatten to form 2 disks. Cover with plastic wrap and refrigerate 1 hour.


Leave a Reply