
Introduction to Homemade Banana Pudding Cups
Why Homemade Banana Pudding Cups Are a Must-Try Dessert?
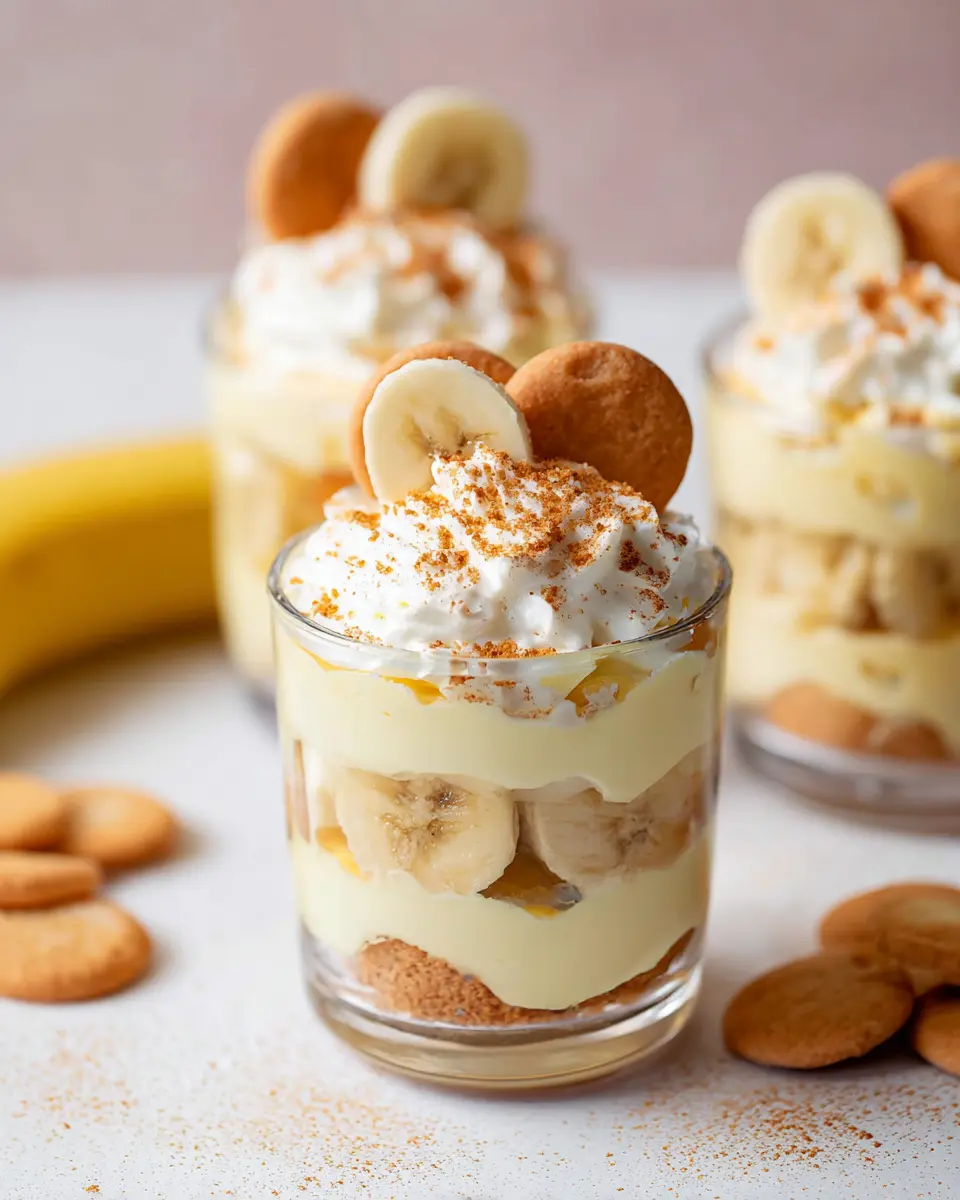
If you're on the hunt for a delicious and nostalgic dessert that will win hearts, look no further than homemade banana pudding cups. There's something incredibly satisfying about layering creamy pudding, fresh bananas, and soft Nilla wafers into individual jars. Not only are they visually appealing, but they also deliver a delightful mix of textures—smooth, crunchy, and creamy in every bite.
One of the best things about making your own banana pudding is the option to customize every layer. Want to swap out traditional heavy cream for light whipped topping? Go for it! Prefer a dash of cinnamon or nutmeg for a twist on flavor? Why not! You’ll love how easily you can put your personal touch on this classic treat.
Also, did you know that homemade desserts can often be healthier than store-bought alternatives? When you prepare them yourself, you can control the ingredients, reducing sugar or opting for organic fruits. Plus, the joy of serving up individual cups straight from your kitchen is unbeatable. Impress your friends at your next summer gathering or simply treat yourself—these pudding cups are not just a dessert; they’re a moment of joy on a spoon!
For more tips on storing fresh bananas and avoiding browning, check out this great resource for helpful information.
Ingredients for Homemade Banana Pudding Cups
When creating delicious homemade banana pudding cups, starting with the right ingredients is essential. Here’s a breakdown to help you gather everything you need for this delightful dessert:
Essential ingredients for the pudding
To make your pudding rich and creamy, gather the following key ingredients:
- 4 cups whole milk: The base for a smooth pudding.
- 1 cup granulated sugar: For that perfect sweetness.
- ¼ cup cornstarch: To thicken the mixture beautifully.
- ¼ teaspoon kosher salt: To balance flavors.
- 4 large egg yolks: Essential for richness.
- 2 tablespoons unsalted butter: For added creaminess.
- 1 tablespoon vanilla extract: A must for flavor.
- 1 teaspoon banana extract (optional): For an extra banana burst.
Key ingredients for the whipped cream
The homemade whipped cream will top off your pudding cups perfectly. You'll need:
- 2 cups heavy whipping cream: Helps achieve that luxurious texture.
- ½ cup powdered sugar: Sweetens without weighing it down.
- 1 teaspoon vanilla extract: For a hint of flavor.
Garnishes to elevate your dessert
To make your banana pudding cups irresistible, consider these garnishes:
- Sliced bananas: Fresh and delightful, they add a pop of flavor.
- Nilla wafers: Classic and crunchy, they provide a delicious contrast.
By gathering these ingredients, you'll be well on your way to creating the ultimate summertime treat! Want more dessert inspiration? Check out this link for more ideas!
Step-by-step Preparation of Homemade Banana Pudding Cups
Homemade banana pudding cups are not just a delicious dessert; they’re a delightful treat that can bring a smile to anyone’s face. Follow this easy step-by-step guide to create your own individual banana pudding cups that'll be the talk of your next gathering!
Gather your equipment
Before diving into the joys of cooking, take a moment to gather your kitchen essentials. Here’s what you’ll need:
- Fine mesh strainer: to ensure your pudding is silky smooth.
- Hand mixer: for effortlessly whipping up your cream.
- Small jars or cups: the perfect way to serve your pudding in single portions.
With your tools at the ready, you can jump right into the deliciousness ahead!
Prepare the banana pudding
First up is the star of the show: the banana pudding. Begin by scalding 4 cups of whole milk in a large pot over medium heat until it’s just about boiling. While your milk warms up, mix together ¼ cup cornstarch, 1 cup sugar, and ¼ teaspoon kosher salt in a separate saucepan. Once your milk is warm, gradually whisk it into your dry mixture, about half a cup at a time.
Keep stirring as it thickens—this will take some patience, but trust me, good things come to those who wait! When it’s thick enough to coat the back of a spoon, remove it from heat. Carefully temper your egg yolks by drizzling in some pudding before returning it to the pot. Stir in 2 tablespoons of unsalted butter, 1 tablespoon vanilla extract, and some optional banana extract to take your pudding to the next level. Strain the mixture for smoothness, then cover and chill for at least an hour.
Make the whipped cream
While that lovely pudding cools down, it’s time to prepare some luxurious whipped cream. In a mixing bowl, combine 2 cups of heavy whipping cream with half a cup of powdered sugar and a teaspoon of vanilla extract. Use your hand mixer and whip it until stiff peaks form. Watching it transform is one of the simplest joys of cooking!
Assemble your banana pudding cups
Now comes the fun part—assembly! If you want those banana slices to maintain their sunlight, toss them gently in a hint of lemon juice. Begin layering by placing 3-4 Nilla wafers at the bottom of your jars. Next, add a spoonful of that glorious pudding and a bed of banana slices. Top it off with a generous dollop of whipped cream. Repeat the layers until your jars are filled to the brim!
Chill and let the flavors meld
For the best experience, allow your homemade banana pudding cups to chill in the fridge for around 2 hours. This not only lets the flavors meld beautifully but also gives the Nilla wafers a chance to soften just enough. Trust me; the wait will be worth it when you dig in!
These banana pudding cups are perfect for summer gatherings or as a sweet afternoon snack. Enjoy the process and the delightful results!
Variations on Homemade Banana Pudding Cups
Chocolate Banana Pudding Cups
For a delightful twist on homemade banana pudding cups, try adding chocolate! Simply blend chocolate pudding mix with the vanilla pudding base or melt dark chocolate into the warm pudding as it thickens. Layer it with banana slices and whipped cream, finishing with shaved chocolate on top for a delicious contrast. This version is a hit for chocolate lovers and adds a rich depth of flavor to this classic dessert.
Vegan Banana Pudding Cups
Want to enjoy homemade banana pudding cups without dairy? It’s easy! Substitute regular milk with almond milk or coconut milk and use a vegan whipped topping. You can even replace the egg yolks with a cornstarch slurry to thicken your pudding. Layer your vegan pudding with banana slices and dairy-free cookies for an irresistible, plant-based treat that everyone will love. Explore more vegan dessert ideas here to keep your sweet tooth satisfied!
Cooking Tips and Notes for Homemade Banana Pudding Cups
Tips for Perfect Pudding Consistency
To achieve that luscious, creamy texture in your homemade banana pudding cups, make sure to whisk constantly while adding the milk. This prevents lumps and helps the pudding thicken evenly. Don’t rush the process; allow it time to cool before chilling, as it should be thick enough to coat the back of a spoon for the best results.
Storing Leftover Pudding
If you have any leftovers (which is rare!), store the pudding in an airtight container in the fridge for up to a week. Be sure to press plastic wrap directly onto the surface to prevent a film from forming. When ready to enjoy, layer it with fresh bananas and whipped cream for a quick treat!
For more banana-related inspiration, check out How to Choose the Best Bananas.
Serving Suggestions for Homemade Banana Pudding Cups
Creative Ways to Present Them
Elevate your homemade banana pudding cups by experimenting with presentation! Use mini jars for a rustic vibe, or opt for elegant glassware to impress guests at dinner parties. Layer the pudding, bananas, and whipped cream in clear dessert cups to showcase those vibrant layers. You can even add a sprinkle of crushed nilla wafers atop for extra texture and sweetness. Consider prepping them for individual servings in mason jars — perfect for picnics or casual gatherings!
Pairings That Complement the Dessert
To complement your delicious pudding, think about serving them alongside fresh fruit, like strawberries or raspberries, for a tart contrast. A scoop of vanilla bean ice cream can make it a blissful sundae! You might also consider pairing with a light herbal tea or sparkling berry-infused water for a refreshing touch.
Let these ideas inspire your next gathering!
Time Breakdown for Homemade Banana Pudding Cups
Preparation Time
It takes just 10 minutes to gather your ingredients and whip up the base for your delicious homemade banana pudding cups. In this quick and easy prep, you’ll be combining milk, sugar, and cornstarch to create a creamy pudding.
Cooking Time
Once prepped, the cooking time is approximately 20 minutes. You’ll be stirring and thickening that fabulous pudding mixture until it reaches the right consistency—perfect for layering!
Chilling Time
Patience is key! Allow your pudding cups to chill for at least 2 hours before serving. This time ensures the flavors meld beautifully and the Nilla wafers soften up for that irresistible texture.
Remember, good things come to those who wait! Start making your homemade banana pudding cups early, and they’ll be the star of any gathering. For more dessert ideas, check out this guide on making perfect whipped cream.
Nutritional Facts for Homemade Banana Pudding Cups
Calories per serving
Each serving of these delicious homemade banana pudding cups contains approximately 475 calories. This makes for a satisfying yet indulgent treat that’s perfect for summer gatherings or cozy evenings at home.
Key nutritional highlights
In addition to being a sweet delight, your pudding cups pack a nutritional punch with:
- Carbohydrates: 44g, providing energy for your day
- Protein: 7g, helping keep you fuller for longer
- Fat: 31g, with a hefty amount coming from creamy ingredients
Enjoy this delightful dessert while being mindful of the balance between enjoyment and nutrition! For a deeper look into your nutritional needs, check out this guide on Understanding Nutritional Labels.
FAQs about Homemade Banana Pudding Cups
Can I use different types of bananas?
Absolutely! While ripe Cavendish bananas are commonly used for their sweet flavor and easy availability, you can experiment with other varieties. Plantains can yield different textures, while red bananas offer a unique taste profile. Just be mindful that some bananas may change the flavor of your homemade banana pudding cups slightly, so feel free to try until you find your favorite!
How long will the pudding cups last in the fridge?
Your delightful banana pudding cups can be stored in the refrigerator for up to a week. However, they’re best consumed within 2-3 days for optimal flavor and texture. If you're making them in advance, consider prepping the pudding but assembling the cups closer to your serving time to keep everything fresh!
Can I make this recipe gluten-free?
Yes, you can definitely make homemade banana pudding cups gluten-free! Simply swap traditional Nilla Wafers for gluten-free cookies or wafers that you love. Ensure that all your other ingredients are gluten-free as well, and you’re good to go! For additional tips on gluten-free baking, check out reputable sites such as the Gluten-Free Baking School.
Conclusion on Homemade Banana Pudding Cups
Creating homemade banana pudding cups is not just about enjoying a delicious dessert; it's also about relishing the process. This layered delight is perfect for summer celebrations or quick sweet treats. Versatile and fun, you can customize these cups to suit any occasion. Dive in and relish every delightful spoonful!
Homemade Banana Pudding Cups
Equipment
- fine mesh strainer
- hand mixer
- small jars
Ingredients
Banana Pudding
- 4 cups whole milk
- 1 cup granulated sugar
- 0.25 cup cornstarch
- 0.25 teaspoon kosher salt
- 4 large egg yolks
- 2 tablespoons unsalted butter room temperature
- 1 tablespoon vanilla extract
- 1 teaspoon banana extract optional
Whipped Cream
- 2 cups heavy whipping cream
- 0.5 cup powdered sugar
- 1 teaspoon vanilla extract
Garnish
- sliced bananas
- nilla wafers
Instructions
Pudding
- Scald the milk in a large pot on the stove top over medium heat (or in the microwave), until it is almost boiling.
- In a large sauce pan, combine the cornstarch, sugar, and salt.
- Over medium-low heat, slowly add in the milk about ½ cup at a time while whisking constantly.
- As the filling begins to thicken, add in another ½ cup of milk and continue whisking.
- Once all of the milk is added and the filling has thickened (enough to coat the back of a spoon), remove the pot from the heat.
- Pour about ½ cup of the filling into a glass measuring cup and then slowly drizzle it into the beaten egg yolks, whisking constantly until fully combined and smooth.
- Pour the egg mixture back into the pot with the rest of the filling and cook for an additional 2-3 minutes or until the filling has thickened to a pudding consistency.
- Stir in the butter and vanilla extract (and banana extract if using) until smooth.
- Pour the pudding through a fine mesh strainer to remove any lumps.
- Transfer to a bowl and cover with plastic wrap (place the plastic wrap directly on the surface of the vanilla pudding so a film doesn't form). Chill for at least 1 hour! Store in the fridge for up to a week.
Whipped Cream
- In the bowl of a stand mixer fitted with the whisk attachment, or in a large mixing bowl using an electric hand mixer, combine the heavy whipping cream, powdered sugar, and vanilla.
- Whip the mixture until it starts to thicken and stiff peaks form.
Assembly
- To keep the banana slices from turning brown, gently toss in a little bit of lemon juice for a few minutes.
- Place 3-4 mini vanilla wafer cookies at the base of each jar or cup. Then spoon a small layer of pudding over top. Layer 4-5 banana slices over the pudding and top with a layer of whipped cream. Repeat the layers until you reach the top of the jar!
- Let the pudding cups chill for about 2 hours before serving so that the nilla wafers can soften slightly.
Leave a Reply