
Introduction to Cherry Pie Filling
Why Homemade Cherry Pie Filling is a Must-Try
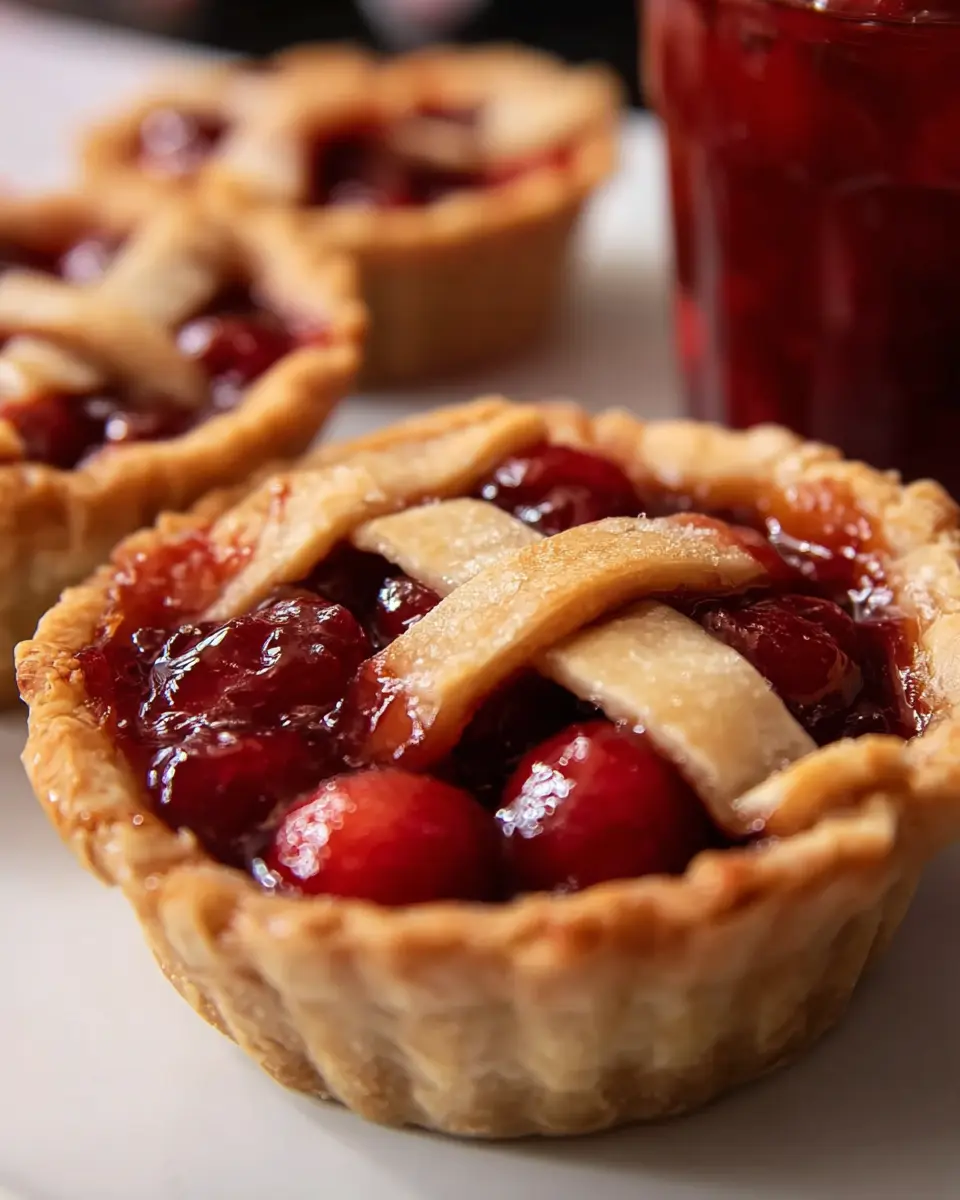
There's something enchanting about the aroma of a homemade cherry pie sizzling in the oven. Making your own cherry pie filling is not only easy but incredibly rewarding. The delightful combination of tart cherries, sugar, and cornstarch melds into a sweet, sticky filling that enhances any dessert.
Store-bought options may save time, but they often lack the fresh flavor and vibrant color that comes from using high-quality ingredients. Fresh cherries, bursting with flavor, take your pie to the next level. According to a survey from the American Pie Council, fruit pies are the most favored type of pie, with cherry pie often topping the list. This popularity means a homemade cherry filling not only impresses your friends but connects you with a nostalgic aspect of cooking that cherishes tradition.
Using recipes like mrsC's can be a game-changer for your baking endeavours. You can whip together this cherry pie filling in just 40 minutes! Plus, you can easily adapt the recipe to include alternative sweeteners or thickeners if you're aiming for different dietary preferences or taste profiles.
Whether you're gearing up for a family gathering or just looking to treat yourself, homemade cherry pie filling is a delightful way to enjoy this classic dessert! For more inspiration, check out our guide on baking with seasonal fruits.
Essential Ingredients for the Perfect Cherry Pie Filling
Creating a delicious cherry pie filling requires just a few simple ingredients that come together beautifully. Let’s break them down to ensure your pie turns out perfectly every time!
-
Tart Red Cherries: Start with 4 cups of pitted tart red cherries. You can use fresh cherries in season or frozen ones, which are often just as flavorful. Make sure to pit them for a smooth texture in your filling.
-
White Sugar: Often underestimated, 1 cup of white sugar balances the tartness of the cherries. It’s essential for creating that sweet-tart flavor profile that makes cherry pie so delightful. You could even experiment with alternatives, like coconut sugar for a different taste.
-
Cornstarch: This ¼ cup acts as a thickening agent, giving your filling that perfect gel-like consistency. As the mixture simmers, cornstarch binds with the cherry juices, ensuring your pie will hold its shape when sliced.
For more great tips on cherry pie fillings, check out sources like The Kitchn and Serious Eats. Happy baking!
Preparing Cherry Pie Filling
Making your own cherry pie filling is a gratifying experience that brings together the delightful flavors of tart cherries and a hint of sweetness. With just three simple ingredients, you can create a luscious filling that elevates your homemade pies to the next level. Let’s dive into how to prepare this cherry pie filling step by step!
Gather and prep your ingredients
Before you begin, take a moment to gather and prep your ingredients. You’ll need:
- 4 cups pitted tart red cherries – Fresh cherries are fantastic, but if they’re out of season, frozen cherries will work beautifully too.
- 1 cup white sugar – This will sweeten the natural tartness of the cherries.
- ¼ cup cornstarch – This is your secret weapon to achieve that perfect, thick consistency in your filling.
Make sure you have all your tools ready: a saucepan, a stirring utensil, and a mixing bowl for the sugar and cornstarch. Preparation is key to a smooth cooking process, so don’t skip this step!
Cook the cherries to release their juices
Now that everything is prepped, it’s time to cook the cherries. In a medium saucepan over medium heat, add your pitted cherries. Cover the pan and stir often; you want to ensure the cherries heat evenly. Cook for about 10 to 15 minutes until they release their juices and start to simmer. This step is crucial as it allows the cherries to soften and create that beautiful syrupy base for your cherry pie filling. If you're curious about the science behind this, check out Culinary Arts.
Combine sugar and cornstarch
While your cherries are cooking, it’s time to prepare the sweetening mixture. In a mixing bowl, whisk together the sugar and cornstarch until well combined. This blend will help thicken your cherry pie filling perfectly. Cornstarch is a fantastic thickening agent—much better than flour for achieving a clear and glossy filling.
Thicken the filling on the stove
Now, pour the sugar and cornstarch mixture directly into your hot cherries. Continue stirring and bring everything to a gentle simmer over low heat. Cook for about 2 minutes or until your filling thickens nicely. You’ll see it transform into a luscious, glossy mixture that’s simply irresistible. This step is essential to ensure that your filling holds up well in the pie and doesn’t run everywhere when you slice into it.
Cool before using
After thickening, remove the saucepan from heat. Allow the cherry pie filling to cool completely before using it in your favorite pie crust. Letting it cool not only improves the texture, preventing the pie dough from becoming soggy, but it also allows the flavors to meld beautifully together.
And there you have it! A simple yet sumptuous homemade cherry pie filling that’s ready to star in your next baking adventure. With just a few steps and a bit of patience, you'll create a delicious filling that friends and family will love. Happy baking!
Variations on Cherry Pie Filling
Using Fresh Cherries versus Frozen Cherries
Choosing between fresh and frozen cherries can significantly affect your cherry pie filling's flavor and texture. Fresh cherries shine during the season, delivering vibrant sweetness and a beautiful bite. However, frozen cherries are an excellent alternative when fresh isn't available. They’re often frozen at peak ripeness, locking in their tartness. For the best results, let frozen cherries thaw slightly before cooking; this helps manage excess liquid that may alter your filling's consistency.
Adding Spices for an Extra Kick
Elevate your cherry pie filling by introducing spices! A dash of cinnamon or a hint of almond extract can add warmth and depth. For a unique twist, consider adding grated ginger or nutmeg. Not only do these spices enhance the flavor, but they also create an inviting aroma—perfect for family gatherings or cozy evenings. For tips on selecting spices, check out this source for more ideas!
Cooking Tips and Notes for Cherry Pie Filling
How to ensure your filling is perfectly thick
Achieving that just-right thickness in your cherry pie filling is essential for a great pie. Use cornstarch as a thickening agent, using a ratio of about ¼ cup for every four cups of cherries. Make sure to thoroughly mix the cornstarch with sugar before adding it to the hot cherries. This helps prevent clumps and ensures an even, glossy consistency. If you find your filling is too thin, a quick simmer can help thicken it up even more—just keep an eye on it to avoid burning.
Storing tips for longer freshness
To extend the freshness of your cherry pie filling, store it in an airtight container in the refrigerator. It’s best used within a week but can last up to two weeks if sealed properly. For longer storage, consider freezing it—just be sure to leave some space in the container for expansion. You can also use freezer-safe bags, removing as much air as possible before sealing. When ready to use, thaw it in the fridge overnight and give it a gentle stir before adding it to your pie crust.
For more on cherry preservation, explore resources like the National Center for Home Food Preservation for tips and techniques. Happy baking!
Serving suggestions for Cherry Pie Filling
Perfect pairings: ice cream, whipped cream, and more
When it comes to cherry pie filling, the classics are truly unbeatable. A scoop of creamy vanilla ice cream or a dollop of fluffy whipped cream makes for an irresistible combination that balances the sweet-tart flavor of the cherries. Why not consider a splash of almond extract in your whipped cream for a delightful twist? For a cozy vibe, serve your cherry filling warm over a rich scoop of chocolate ice cream, creating a delightful contrast that’s simply heavenly.
Creative serving ideas beyond the pie crust
Don’t limit your cherry pie filling to just pies! Try using it as a topping for pancakes or waffles for a scrumptious breakfast treat. You can even mix it into yogurt or oatmeal for a fruity punch. Looking to impress? Layer it between slices of sponge cake to create a refreshing trifle or fold it into a cheesecake batter for a stunning dessert. With such versatility, your cherry-filled creations are sure to delight friends and family! For more creative ideas, check out sources like Food Network and Bon Appétit for inspiration.
Time Breakdown for Cherry Pie Filling
Planning to whip up your delightful cherry pie filling? Here’s how the time breaks down:
Preparation Time
Allow yourself 25 minutes to gather and prep your ingredients. This includes washing, pitting, and measuring the cherries, sugar, and cornstarch.
Cooking Time
The cooking process will take about 15 minutes. This involves simmering the cherries and thickening the mixture to perfection, ensuring that your filling is bursting with flavor.
Total Time
In just 40 minutes, you’ll have your delicious cherry pie filling ready to use! This means you can spend less time in the kitchen and more time enjoying those sweet pie moments!
For tips on perfecting your cherry pie, check out this helpful guide on pie-making techniques!
Nutritional Facts for Cherry Pie Filling
When indulging in homemade cherry pie filling, it’s helpful to know what you’re consuming. Here’s a quick look at the nutritional profile:
Calories
Each serving of cherry pie filling contains approximately 219 calories. This makes it a satisfying treat that won't break your calorie bank.
Sugars
You’ll find 47 grams of total sugars in a serving, primarily from the natural sweetness of the cherries and added sugar, creating that deliciously rich flavor we all love.
Fiber Content
This delightful filling also offers 2 grams of dietary fiber per serving, contributing to your daily fiber intake and supporting digestive health.
For more insights about nutritional values behind various fruits, you might want to check out sources like the USDA Food Composition Database for detailed information. Enjoy your cherry pie guilt-free!
FAQs about Cherry Pie Filling
Can I substitute ingredients in the cherry pie filling?
Absolutely! If you’re looking to switch things up, you can experiment with alternative sweeteners like honey or maple syrup instead of white sugar. Additionally, if you're in a pinch, clear gel can replace cornstarch for thickening. Just remember that the flavor may vary slightly!
How long can I store homemade cherry pie filling?
Homemade cherry pie filling can be stored in an airtight container in the refrigerator for about 5-7 days. For longer storage, consider freezing it! It can last up to a year in the freezer. Just make sure to thaw it in the fridge before using.
What are the best uses for leftover cherry pie filling?
Don’t let that delicious cherry pie filling go to waste! Here are some tasty ideas:
- Topping for desserts: Use it over ice cream, yogurt, or pancakes.
- In breakfast: Stir it into oatmeal or spread it on toast.
- Baking: Incorporate it into muffins or pastries.
For more ideas on utilizing leftover cherry pie filling, check out this resource. Happy baking!
Conclusion on Cherry Pie Filling
In summary, making your own cherry pie filling is not only simple but also incredibly rewarding. With just three ingredients, you can create a delicious homemade treat that elevates any dessert. Feel free to experiment with the recipe and enjoy the sweet and tart flavors of fresh or frozen cherries!
Cherry Pie Filling
Equipment
- saucepan
Ingredients
- 4 cups pitted tart red cherries
- 1 cup white sugar
- ¼ cup cornstarch
Instructions
- Gather the ingredients.
- Place cherries into a saucepan over medium heat. Cover and cook, stirring often, until cherries release their juices and come to a simmer, 10 to 15 minutes.
- Whisk sugar with cornstarch in a bowl until combined; pour mixture into hot cherries and juice. Stir until thoroughly combined.
- Bring to a simmer over low heat; cook until thickened, about 2 minutes. Remove from heat and let cool before using as pie filling.

Leave a Reply