
Introduction to Homemade Soft Breadsticks
Why Homemade Breadsticks Are a Game-Changer for Young Professionals
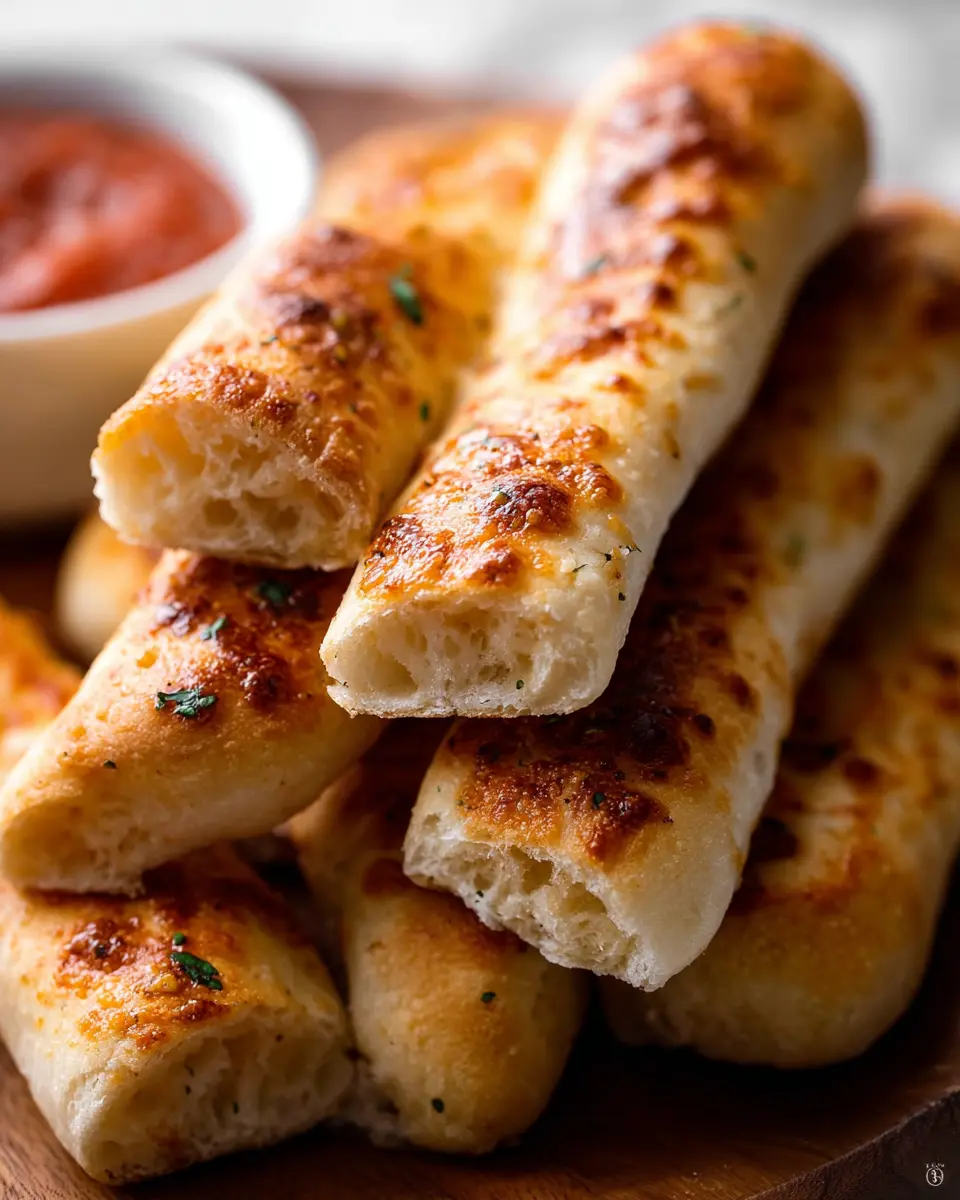
After a long day at work, the last thing you want to do is struggle with complex dinner preparations. Enter homemade soft breadsticks. These warm, fluffy delights not only elevate your dinner game, but they're also a breeze to make. Imagine serving up a tasty batch alongside your favorite soups, salads, or pasta—who wouldn't smile at that?
Making breadsticks at home is incredibly rewarding and often surprisingly simple. While you might think baking bread requires specialized skills, this recipe proves otherwise. The process includes two rises, giving you ample time to unwind or tackle some household chores while the dough does its magic. It's the perfect way to impress friends or family during a gathering, all while keeping things stress-free.
Plus, there's something delightful about the aroma of garlic and warm bread wafting through your home. As you whip up these homemade soft breadsticks, you'll appreciate how they can transform a basic meal into a memorable dining experience. Ready to get started? A quick browse through easy baking tips can help ensure your perfect breadsticks come out just right. Let's roll up those sleeves!
Ingredients for Homemade Soft Breadsticks
Creating the perfect batch of homemade soft breadsticks begins with the right ingredients. Here's a breakdown to ensure your dough rises beautifully and yields that fluffy texture you crave.
Essential ingredients for the perfect breadsticks
- Warm water: About 1 and ¼ cups is crucial. This activates the yeast and helps create those airy pockets in the bread.
- Yeast: Use 2 and ¼ teaspoons of instant or active dry yeast. This is what gives your breadsticks that delightful rise.
- Granulated sugar: Just 2 tablespoons lightens the dough and enhances flavor.
- Unsalted butter: Three tablespoons, melted, provides richness and moisture.
- Salt: Essential for flavor, 1 and ½ teaspoons will do the trick.
- Bread flour: Approximately 3 and ⅓ cups creates that chewy texture. You can find tips on measuring flour here.
Optional ingredients to elevate your breadsticks
- Garlic powder: A ½ teaspoon adds a savory element.
- Toppings: Consider melted butter, salt, and garlic powder for brushing, plus herbs like parsley for a beautiful finish.
With these ingredients in hand, you're ready to whip up some delicious homemade soft breadsticks that can elevate any meal! Don't forget to check out expert tips on yeast baking for extra guidance.
Preparing Homemade Soft Breadsticks
Baking homemade soft breadsticks is an enjoyable and rewarding experience, perfect for both seasoned bakers and beginners. With a few simple steps, you can create delicious, fluffy breadsticks that pair wonderfully with a variety of meals. Let’s dive into this easy recipe!
Prepare the Dough
Start by whisking together 1 and ¼ cups of warm water (between 100–110°F), 2 and ¼ teaspoons of yeast, and 2 tablespoons of sugar in the bowl of your stand mixer. Let this mixture sit for about 5–10 minutes until it becomes frothy—this step activates the yeast, ensuring your breadsticks will rise nicely. If you’re mixing by hand, a large bowl and a wooden spoon will do just fine!
Knead the Dough for the Perfect Texture
Once the yeast is frothy, add in 3 tablespoons of melted butter, 1 and ½ teaspoons of salt, 1 cup of bread flour, and garlic powder if you’re a fan of that extra flavor. Mix it on low speed, then gradually incorporate the remaining flour. Knead the dough for about 8–10 minutes until it’s soft and slightly tacky. If it feels too sticky, sprinkle in more flour a little at a time. Don’t rush this step; proper kneading is key to achieving that soft texture.
Allow the Dough to Rise
Lightly grease a large bowl and place your dough inside, turning it to coat all sides. Cover the bowl and let the dough rise in a warm spot for about 1.5 to 2 hours or until it has doubled in size. An excellent tip is to find a cozy spot in your kitchen, like near a sunny window or on top of the oven while it preheats!
Shape the Breadsticks
Once your dough has risen, punch it down to release the air and divide it into two halves. Roll each half into logs about 8 inches long. Cut each log into 7 pieces, then shape those into individual breadsticks. Lay them out on your baking sheets lined with parchment paper or silicone mats.
The Critical Second Rise
Now it’s time for the second rise! Cover the shaped breadsticks with a towel and let them puff up for about 20 minutes while your oven preheats to 400°F (204°C). This crucial step will help in creating soft, airy sticks.
Bake the Breadsticks to Golden Perfection
Pop your breadsticks into the preheated oven and bake for 18–19 minutes, or until they are golden brown. Don’t forget to rotate the pans halfway through for even baking. If they are browning too quickly, tent them with aluminum foil.
Brush with Garlic Butter and Enjoy!
The final touch is to melt 2 tablespoons of butter, mixing in some salt and garlic powder. Once out of the oven, brush this flavorful mixture over the warm breadsticks and sprinkle with dried parsley if desired. These homemade soft breadsticks are best enjoyed fresh and warm, making them the perfect addition to any meal.
Whether you are hosting a dinner party or enjoying a quiet evening at home, these delightful breadsticks are sure to impress! For additional tips on baking bread, be sure to check out my Baking With Yeast Guide. Happy baking!
Variations on Homemade Soft Breadsticks
Cheesy Garlic Breadsticks
Transform your homemade soft breadsticks into a cheesy delight! Simply sprinkle 1 cup of shredded mozzarella or a cheese blend right before the final few minutes of baking. The gooey, melted cheese paired with the garlic butter topping creates an irresistible snack that pairs beautifully with pasta or soups. Who can resist a cheesy breadstick?
Herb-Infused Breadsticks
Elevate the flavor of your homemade soft breadsticks with herbs. Incorporate a blend of dried basil, oregano, and thyme into the dough or sprinkle fresh herbs on top before baking. This not only adds a delightful aroma but also a sophisticated touch to your dinner spread. You can also browse this Herb Infused Ideas Guide for inspiration!
Sweet Cinnamon Sugar Breadsticks
For a unique twist, consider making sweet homemade soft breadsticks. After baking, brush them with melted butter and sprinkle a mixture of cinnamon and sugar on top. These sweet treats can serve as a delightful dessert or a fun breakfast option paired with coffee. It’s amazing how versatile breadsticks can be!
Cooking Tips and Notes for Homemade Soft Breadsticks
Common pitfalls and how to avoid them
One of the most common mistakes when making homemade soft breadsticks is failing to let the dough rise correctly. Ensure your dough is in a warm spot and doesn’t rush the process; this step is crucial for fluffy results. Also, be careful not to overload on flour while kneading. The dough should remain soft and slightly sticky. If you’re unsure about kneading, check out some helpful resources on kneading techniques to master this skill!
Storage tips for freshness and taste
To keep your soft breadsticks fresh and tasty, store them at room temperature in an airtight container for up to one day or in the refrigerator for up to five days. For longer storage, freeze baked breadsticks for up to three months. Just remember to wrap them tightly in plastic wrap before freezing! When you're ready to enjoy them, simply leave them out to thaw or reheat in the oven at 300°F (149°C) for about ten minutes. Enjoying fresh breadsticks has never been easier!
Serving Suggestions for Homemade Soft Breadsticks
Pairing Ideas for Your Breadsticks
When it comes to enjoying your homemade soft breadsticks, the sky's the limit! These versatile treats pair wonderfully with:
- Soups: Try them alongside a warm bowl of tomato basil or a hearty minestrone.
- Salads: A fresh garden salad drizzled with vinaigrette complements the fluffy texture perfectly.
- Dips: Serve with marinara, hummus, or a cheesy spinach dip for a fun twist.
Consider mixing in a touch of garlic powder to take your flavor game up a notch!
Creative Serving Styles for Your Dinner Table
Elevate your dining experience by presenting your homemade soft breadsticks in a charming way:
- Basket Display: Gather the breadsticks in a rustic breadbasket lined with a cloth for a cozy feel.
- Skewered Style: Thread them onto skewers for a fun, shareable experience.
- Platter Pairing: Arrange them on a platter with an array of dips to encourage conversation and sampling.
With these serving suggestions, your homemade meal transforms into a delightful culinary experience! Check out The Kitchn for more creative serving ideas.
Time Breakdown for Homemade Soft Breadsticks
Prep time
Getting your dough ready takes about 20 minutes. This includes mixing the ingredients and kneading the dough until it reaches the perfect texture.
Rising time
Your homemade soft breadsticks will need 1 hour and 50 minutes for their first rise. After shaping, the second rise will only take about 20 minutes, making it perfect for when you're pressed for time.
Baking time
The last step, baking, will take 18–19 minutes in the oven. Just enough time to enjoy the delightful aroma while you wait!
Total time
In total, you’re looking at around 3 hours from start to finish. With some planning, you’ll have freshly baked, buttery breadsticks ready to impress your dinner guests!
For more bread-making tips, check out my Baking With Yeast Guide. Let’s make those breadsticks a reality!
Nutritional Facts for Homemade Soft Breadsticks
Calories per serving
Each of these delightful homemade soft breadsticks contains approximately 150 calories. Enjoy them as a tasty side without the guilt.
Key nutrients
These breadsticks offer a modest amount of essential nutrients. Each serving includes:
- Carbohydrates: 30g, providing energy to keep you going
- Protein: 4g, building and repairing tissues
- Fat: 3g, necessary for many bodily functions
For more details on nutrition and to boost your breadstick experience, check out sources like the USDA FoodData Central for comprehensive food databases.
FAQs about Homemade Soft Breadsticks
Can I freeze these breadsticks?
Absolutely! Homemade soft breadsticks freeze wonderfully. After baking, let them cool completely, then store in an airtight container or freezer bag for up to three months. To enjoy, simply thaw them on the counter or in the refrigerator overnight. Reheat them in the oven at 300°F (149°C) for about 10 minutes to restore their soft texture.
What should I do if the dough doesn’t rise?
If your dough isn’t rising, it might be due to inactive yeast. Ensure your yeast is fresh; test it by mixing it with warm water and sugar—if it bubbles after 5-10 minutes, it’s good to go! Also, try placing your dough in a warm, draft-free area. If it’s a chilly day, a helpful tip is to place the dough in an oven that’s been turned off but slightly warm.
How can I make these breadsticks vegan?
Making your homemade soft breadsticks vegan is easy! Substitute the butter with plant-based margarine or coconut oil for both the dough and the topping. You can also use almond or soy milk instead of water. These simple swaps ensure you can enjoy a fluffy batch without compromising your dietary preferences!
For more tips on baking with yeast, check out resources like King Arthur Baking or America's Test Kitchen.
Conclusion on Homemade Soft Breadsticks
In conclusion, homemade soft breadsticks are a delightful addition to any meal, showcasing a perfect blend of fluffiness and flavor. With just a little patience for rising and baking, you can enjoy these warm, buttery treats fresh from your kitchen. Treat yourself and your loved ones—these breadsticks are sure to impress!
Homemade Soft Breadsticks
Equipment
- Stand Mixer
- mixing bowl
- parchment paper
- baking sheets
Ingredients
Dough
- 1 cup warm water (between 100–110°F, 38–43°C)
- 2.25 teaspoons instant or active dry yeast (1 standard packet)
- 2 tablespoons granulated sugar
- 3 tablespoons unsalted butter melted
- 1.5 teaspoons salt
- 3.33 cups bread flour (spooned & leveled), plus more as needed
- 0.5 teaspoon garlic powder optional
Topping
- 2 tablespoons unsalted butter melted
- 0.25 teaspoon salt
- 0.25 teaspoon garlic powder
- dried parsley for sprinkling on top, optional
Instructions
Making the Dough
- Whisk the warm water, yeast, and sugar together in the bowl of your stand mixer. Allow to sit for 5–10 minutes until foamy.
- Add melted butter, salt, 1 cup of bread flour, and garlic powder. Mix on low speed for 30 seconds, then add remaining flour and beat until the dough pulls away from the sides.
- Knead the dough for 8-10 minutes until it bounces back when poked.
Rising the Dough
- Lightly grease a large bowl, place the dough inside, cover, and let rise for 1.5–2 hours until doubled in size.
- Punch down the dough and divide it in half. Shape each half into 7 logs and arrange them on prepared baking sheets.
- Cover shaped breadsticks and allow to rise for 20 minutes.
Baking
- Preheat the oven to 400°F (204°C). Bake for 18-19 minutes until golden brown.
- Prepare the topping by melting butter and stirring in salt and garlic powder.
- Brush baked breadsticks with garlic butter topping and sprinkle with dried parsley if desired. Serve warm.


Leave a Reply