
Classic New York Cheesecake: A Sweet Introduction
Why is New York cheesecake a classic favorite?
If you’ve ever savored a slice of classic New York cheesecake, you already know why it holds a special place in dessert lovers' hearts. This iconic dish combines a rich and creamy filling with a buttery graham cracker crust, making it a comforting choice for countless occasions—be it a birthday celebration, holiday gathering, or simply a treat for yourself after a long week.
The key to this cheesecake’s enduring popularity lies in its simplicity yet indulgent flavor. With minimal ingredients, it’s easy to make, yet the final product impressively resembles the creamy masterpieces you’d find in high-end bakeries. A well-made cheesecake strikes the perfect balance between texture and taste: it’s dense without being overly heavy, ensuring that each bite leaves you craving more.
Many chefs, including the renowned New York Times Cooking, emphasize the importance of high-quality ingredients, such as full-fat cream cheese and freshly squeezed lemon juice, to elevate your cheesecake experience. Trust me; once you try this dessert, you’ll see why the classic New York cheesecake has become a beloved staple across the globe!
Ingredients for Classic New York Cheesecake
Creating a delightful classic New York cheesecake starts with selecting the perfect ingredients. Let’s break it down for you!
For the Crust
A solid crust sets the stage for your cheesecake. Here’s what you’ll need:
- 1½ cups graham cracker crumbs (this is about 12 whole crackers)
- 5 tablespoons unsalted butter, melted
- 2 tablespoons sugar for a hint of sweetness
- ⅛ teaspoon salt to balance flavors
Mixing these ingredients will give you a buttery, crunchy base that complements the cheesecake beautifully.
For the Filling
Now, let’s craft that rich filling! Gather these ingredients:
- 32 oz cream cheese (four 8-oz blocks), at room temperature for easy mixing
- 2 cups sugar for sweetness
- 3 tablespoons all-purpose flour to help set the filling
- 4 teaspoons vanilla extract for that essential cheesecake flavor
- 1 teaspoon packed lemon zest (from one lemon) for brightness
- 2 teaspoons fresh lemon juice (from one lemon) to enhance the flavor
- ¼ teaspoon salt to round out the taste
- 6 large eggs to ensure a creamy texture
- ½ cup sour cream for extra richness
With these ingredients, you’re well on your way to making an unforgettable classic New York cheesecake! For more cheesecake tips, check out this guide on cheesecakes.
Step-by-Step Preparation of Classic New York Cheesecake
Making a classic New York cheesecake is an art. This creamy, decadent dessert can be a delightful centerpiece for any gathering. Let’s walk through the preparation together!
Prepare the crust
First things first, let’s get that crust ready! Start by preheating your oven to 375°F. While it warms up, grab your 9- or 10-inch springform pan and wrap it with heavy-duty aluminum foil (this will prevent leaks while baking). In a medium-sized bowl, mix together 1½ cups of graham cracker crumbs, 5 tablespoons of melted unsalted butter, 2 tablespoons of sugar, and ⅛ teaspoon of salt. This mixture needs to be pressed evenly into the bottom of your springform pan. Once that's done, pop it in the oven for about 10 minutes until set. After that, take it out and allow it to cool.
Make the cheesecake filling
Now, let’s whip up that heavenly filling! Reduce your oven temperature to 325°F and prepare for some mixing magic. In a large mixing bowl, beat together 32 ounces of cream cheese, 2 cups of sugar, and 3 tablespoons of flour until the mixture is perfectly smooth (about a minute). Remember to scrape down the sides of the bowl. This is essential to avoid any lumps! Add in 4 teaspoons of vanilla extract, 1 teaspoon of packed lemon zest, 2 teaspoons of fresh lemon juice, and ¼ teaspoon of salt. Continue mixing on low until everything is harmonized. Finally, add in 6 large eggs one by one, letting each incorporate fully before the next. Stir in ½ cup of sour cream, and voilà, your classic New York cheesecake filling is ready!
Bake the cheesecake
Time to bake! Place your springform pan into a larger roasting pan. Pour your luscious cheesecake batter over the cooled crust. For a perfectly baked cheesecake, pour boiling water into the roasting pan until it’s about 1 inch up the sides of the springform pan. Bake this beauty for about 1 hour and 30 minutes to 1 hour and 45 minutes—look for just a slight wobble in the center when nudged. Once done, carefully remove it from the oven, letting it cool in the water bath for about 45 minutes.
Cool and refrigerate
After your cheesecake has cooled, remove it from the water bath and take off the foil. Run a knife along the edges to keep it from sticking as it cools. Cover with plastic wrap and place in the refrigerator. This step is crucial — let it cool for at least 8 hours (or overnight) for the best texture!
Serve the cheesecake
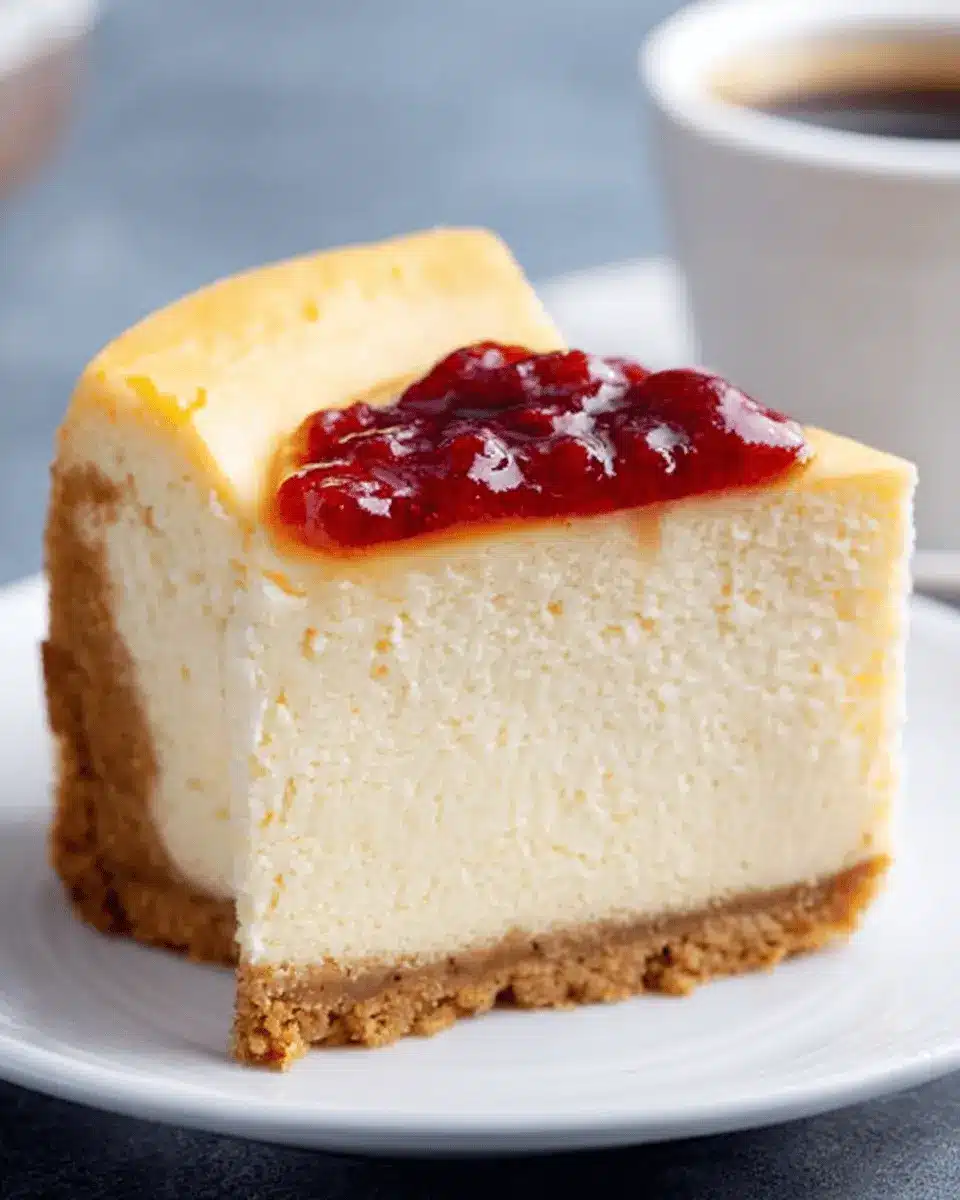
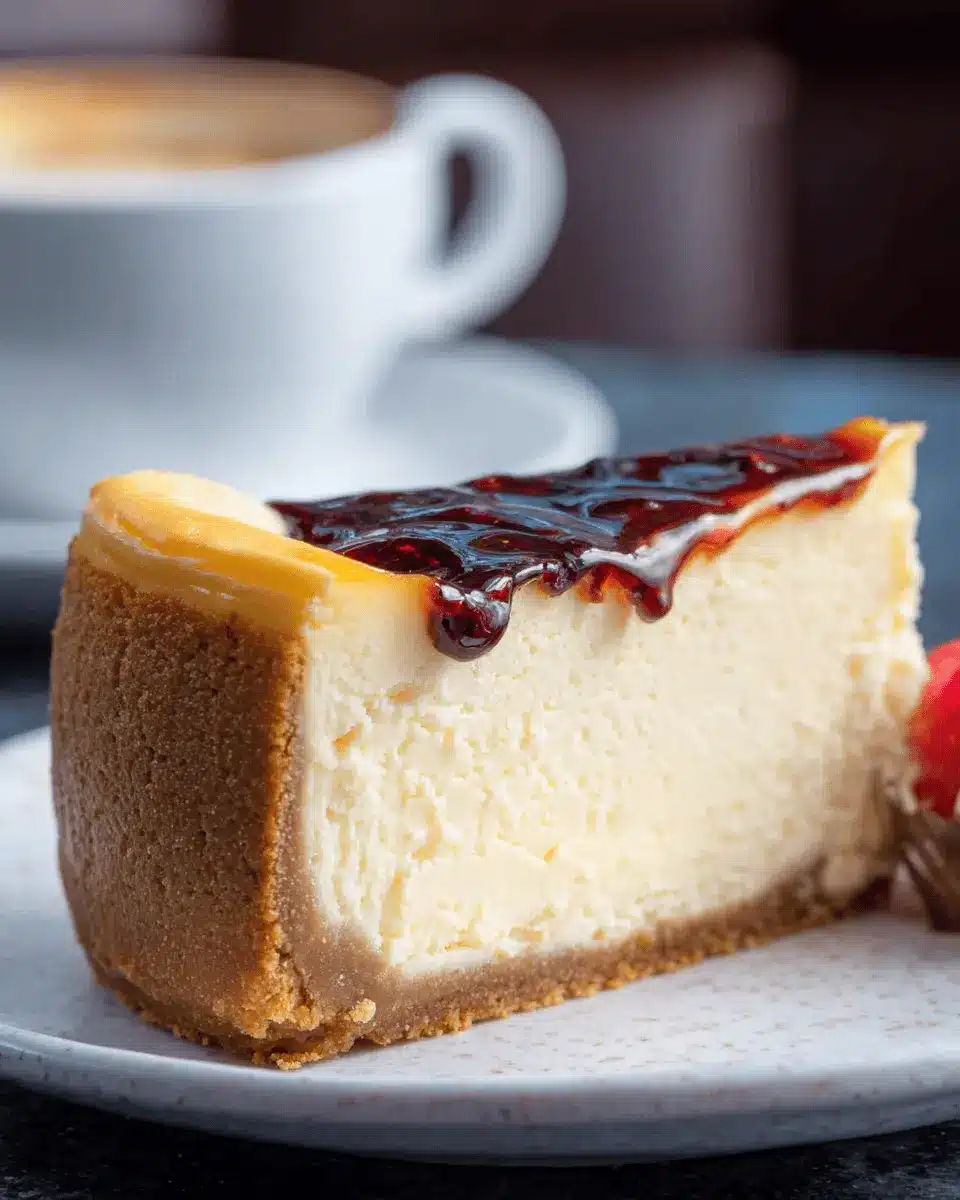
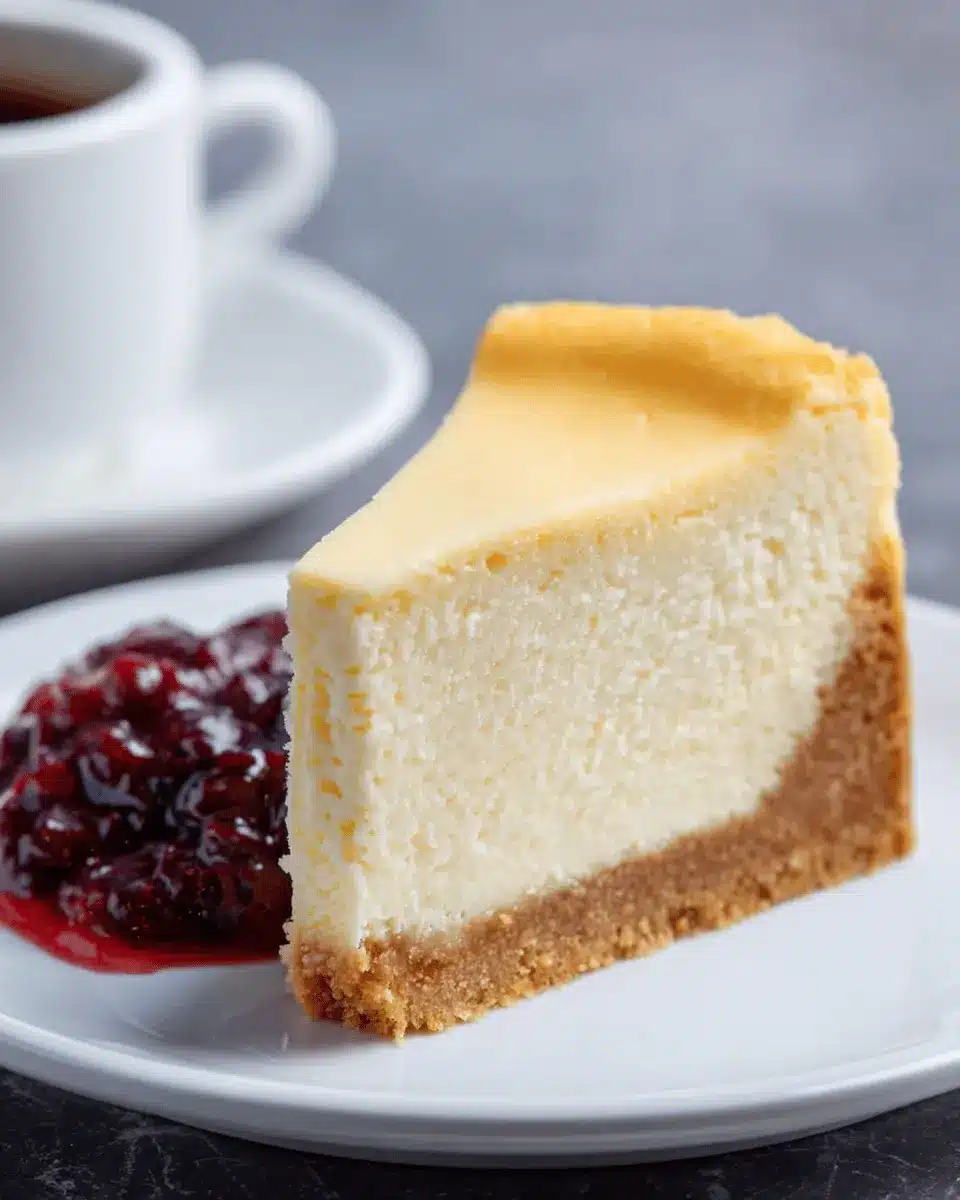
Finally, the moment you've been waiting for! Carefully remove the sides of the springform pan. You can serve it right on the base or transfer it to a serving platter. For a touch of flair, garnish with your choice of berry sauce to enhance those rich flavors. Slice using a sharp knife, giving it a quick wipe between pieces to maintain clean cuts. Enjoy your spectacular classic New York cheesecake, and watch the smiles light up the room!
For more serving tips and variations, check out this detailed guide on cheesecake presentations. Happy baking!
Variations on Classic New York Cheesecake
Fruit-topped Cheesecake
One delightful twist on the classic New York cheesecake is to add a fresh fruit topping. Combine your favorite berries—like strawberries, blueberries, or raspberries—and toss them with a bit of sugar to enhance their natural sweetness. After the cheesecake has chilled, pile the fruit on top for a pop of color and fresh flavor. Check out this berry sauce recipe for an easy homemade option!
Chocolate Swirl Cheesecake
If you’re feeling indulgent, why not create a chocolate swirl cheesecake? Simply melt some semi-sweet or dark chocolate, and before baking, swirl it into the batter for a rich, chocolaty experience. This version not only tastes amazing but also looks stunning when sliced! Try swapping out part of the sour cream in the filling with additional melted chocolate for an even decadent touch.
These variations keep your dessert game fresh while ensuring everyone gets to enjoy their favorite flavors!
Cooking Tips and Notes for Classic New York Cheesecake
Preventing Cracks
Cracks can turn a stunning New York cheesecake into an ordinary dessert, right? To help avoid this, ensure your cream cheese is at room temperature—this prevents overmixing. When mixing, always beat at low speed as high speed incorporates too much air. Additionally, running a knife around the edge after baking can help, allowing the cheesecake to release gently as it cools.
Ensuring the Cheesecake Sets Perfectly
For a perfectly set cheesecake, using a water bath is essential. This maintains an even temperature during baking, creating that creamy texture you crave. Remember to cool the cheesecake gradually; starting in the water bath, then refrigerating overnight solidifies it beautifully. If you want extra flavor, consider adding a splash of vanilla or citrus zest to the sour cream topping.
For more expert baking tips, check out resources like Serious Eats. Happy baking!
Serving Suggestions for Classic New York Cheesecake
Toppings that Enhance Flavor
To elevate your classic New York cheesecake, consider a variety of delightful toppings. Fresh fruit is a crowd-pleaser: strawberries, blueberries, or raspberries add both color and a tart contrast to the creamy filling. Alternatively, a drizzle of rich chocolate or caramel sauce can satisfy the sweet tooth and create a luxurious experience. If you’re feeling adventurous, try a sprinkle of crushed cookies or a dollop of tangy Greek yogurt for added texture and flavor.
Pairing Ideas for a Delightful Dessert Experience
For a truly memorable dessert experience, think about what beverages will complement your classic New York cheesecake. Freshly brewed coffee or a rich espresso can enhance the flavors beautifully, cutting through the creaminess. If you prefer something refreshing, iced herbal teas, like hibiscus or chamomile, are wonderful options. And don’t forget to serve the cheesecake chilled; this not only enhances its taste but also makes every slice a melt-in-your-mouth delight!
With these suggestions, your cheesecake will not only be delicious but also a visual and sensory feast. Enjoy your creation!
Time Breakdown for Classic New York Cheesecake
Preparation Time
You’ll need about 30 minutes to gather your ingredients and prepare the delicious crust and creamy filling. Enjoy the process—this is where the magic begins!
Cooking Time
Set aside approximately 1 hour and 55 minutes for baking. Your cheesecake will need that time to achieve that perfect creamy texture, so don’t rush it!
Cooling Time
Once it’s out of the oven, the cheesecake requires at least 8 hours to cool completely in the refrigerator. Overnight cooling is ideal for the best flavor and texture. Why wait? The irresistible taste is worth it!
For more tips on serving your classic New York cheesecake, check out this helpful guide on making a delicious berry sauce to complement your masterpiece.
Nutritional Facts for Classic New York Cheesecake
Calories per slice
Indulging in a slice of classic New York cheesecake is a delightful experience, but it's good to know what you're consuming. Each slice contains approximately 659 calories. This means it's certainly a treat to savor, making it ideal for special occasions.
Protein content
One of the surprises of this creamy dessert is its protein content. Each slice packs in about 11 grams of protein. This contributes to the overall richness and fullness of the cheesecake, making it a satisfying end to any meal.
Sugar amount
However, a classic New York cheesecake does come with its sweet side, featuring around 49 grams of sugar per slice. It’s essential to enjoy this decadent dessert in moderation, especially if you're watching your sugar intake. For healthier alternatives or ways to reduce sugar, consider checking out resources from Healthline.
Incorporating these nutritional details into your cheesecake experience can help you appreciate the rich flavors while maintaining a balanced lifestyle.
FAQ about Classic New York Cheesecake
What’s the best way to prevent a cheesecake from cracking?
One of the biggest concerns when making a classic New York cheesecake is the dreaded crack. To prevent this, ensure you mix your ingredients gently, avoiding too much air in the batter. Additionally, bake your cheesecake in a water bath to maintain a moist environment and regulate temperature. If cracks do form, don’t fret! A delicious topping, like a berry sauce or whipped cream, can cover it beautifully.
Can I use low-fat cream cheese?
While you can use low-fat cream cheese for a lighter version of your classic New York cheesecake, it may not yield the same rich flavor and texture as full-fat cream cheese. For the best results, I recommend sticking with regular cream cheese for that dense and creamy experience we all love.
How long can I store leftover cheesecake?
You can store leftover classic New York cheesecake in the fridge for up to 5 days, simply covered with plastic wrap. If you'd like to enjoy it later, it also freezes wonderfully! Just wrap it tightly in foil or plastic wrap, and it will keep for up to 3 months. For detailed storage tips, check out sources like Food Safety.
Conclusion on Classic New York Cheesecake
Creating a classic New York cheesecake is more than just a baking project; it’s an experience that brings joy to any gathering. With its velvety texture and rich flavor, this cheesecake is sure to impress. Don’t forget to add personal touches, like a berry sauce, for extra flair!

Classic New York Cheesecake
Equipment
- 9-inch or 10-inch springform pan
- heavy-duty aluminum foil
- electric mixer
Ingredients
For the Crust
- 1.5 cups graham cracker crumbs from 12 whole crackers
- 5 tablespoons unsalted butter melted
- 2 tablespoons sugar
- 0.125 teaspoon salt
For the Filling
- 32 oz cream cheese at room temperature
- 2 cups sugar
- 3 tablespoons all-purpose flour
- 4 teaspoons vanilla extract
- 1 teaspoon lemon zest packed, from 1 lemon
- 2 teaspoons fresh lemon juice from 1 lemon
- 0.25 teaspoon salt
- 6 large eggs
- 0.5 cups sour cream
Instructions
For the Crust
- Preheat the oven to 375°F and set an oven rack in the lower middle position. Wrap a 9- or 10-inch springform pan with one large piece of heavy-duty aluminum foil, covering the underside and extending all the way to the top so there are no seams on the bottom or sides of the pan. Repeat with another sheet of foil for insurance. Spray the inside of the pan with nonstick cooking spray.
- Make the crust: In a medium bowl, combine the graham cracker crumbs, melted butter, sugar, and salt. Stir until well combined. Press the crumbs into an even layer on the the bottom of the prepared pan. Bake the crust for 10 minutes, until set. Remove the pan from the oven and set aside.
- Reduce the oven temperature to 325°F. Set a kettle of water to boil.
- Make the batter: In the bowl of an electric mixer fitted with the paddle attachment or beaters, beat the cream cheese, sugar, and flour together on medium speed until just smooth, about 1 minute. Scrape the bottom and sides of the bowl to be sure the mixture is evenly combined. Add the vanilla, lemon zest, lemon juice, and salt; beat on low speed until just combined. Add the eggs, one at a time, mixing on low speed until incorporated, scraping the bowl as necessary. Mix in the sour cream. Make sure the batter is uniform but do not over-mix.
- Check to make sure your oven has cooled to 325°F, then set the cheesecake pan in a large roasting pan. Pour the batter on top of the crust. Pour the boiling water into the large roasting pan to come about 1 inch up the side of the cake pan. Bake until the cake is just set, 1 hour and 30 minutes to 1 hour and 45 minutes. The cake should not look liquidy at all but will wobble just a bit when the pan is nudged; it will continue to cook as it cools.
- Carefully remove the roasting pan from the oven and set it on a wire rack. Cool the cheesecake in the water bath until the water is just warm, about 45 minutes. Remove the springform pan from the water bath and discard the foil. If necessary, run a thin-bladed knife around the edge of the cake to make sure it's not sticking to the sides (which can cause cracks as it cools), then cover with plastic wrap and transfer to the refrigerator to cool for at least 8 hours or overnight.
- For serving: Remove the sides of the springform pan. Serve the cheesecake right from the base of the pan; or, to transfer it to a serving platter, run a long, thin spatula between the crust and the pan bottom, and then use two large spatulas to carefully transfer the cheesecake to a serving dish. Slice with a sharp knife, wiping the knife clean between slices.
- Make Ahead: The cheesecake can be made and stored in the springform pan in the fridge, tightly covered with plastic wrap, up to two days ahead of time.
- Freezer-Friendly Instructions: The cheesecake can be frozen for up to 3 months. To freeze, place the cake in the freezer briefly, unwrapped, to firm it up. Then double-wrap it tightly with aluminum foil or plastic freezer wrap, or place it in heavy-duty freezer bag. Thaw in the refrigerator the night before you plan to eat it.

Leave a Reply