
Introduction to Apple Cider Vinegar
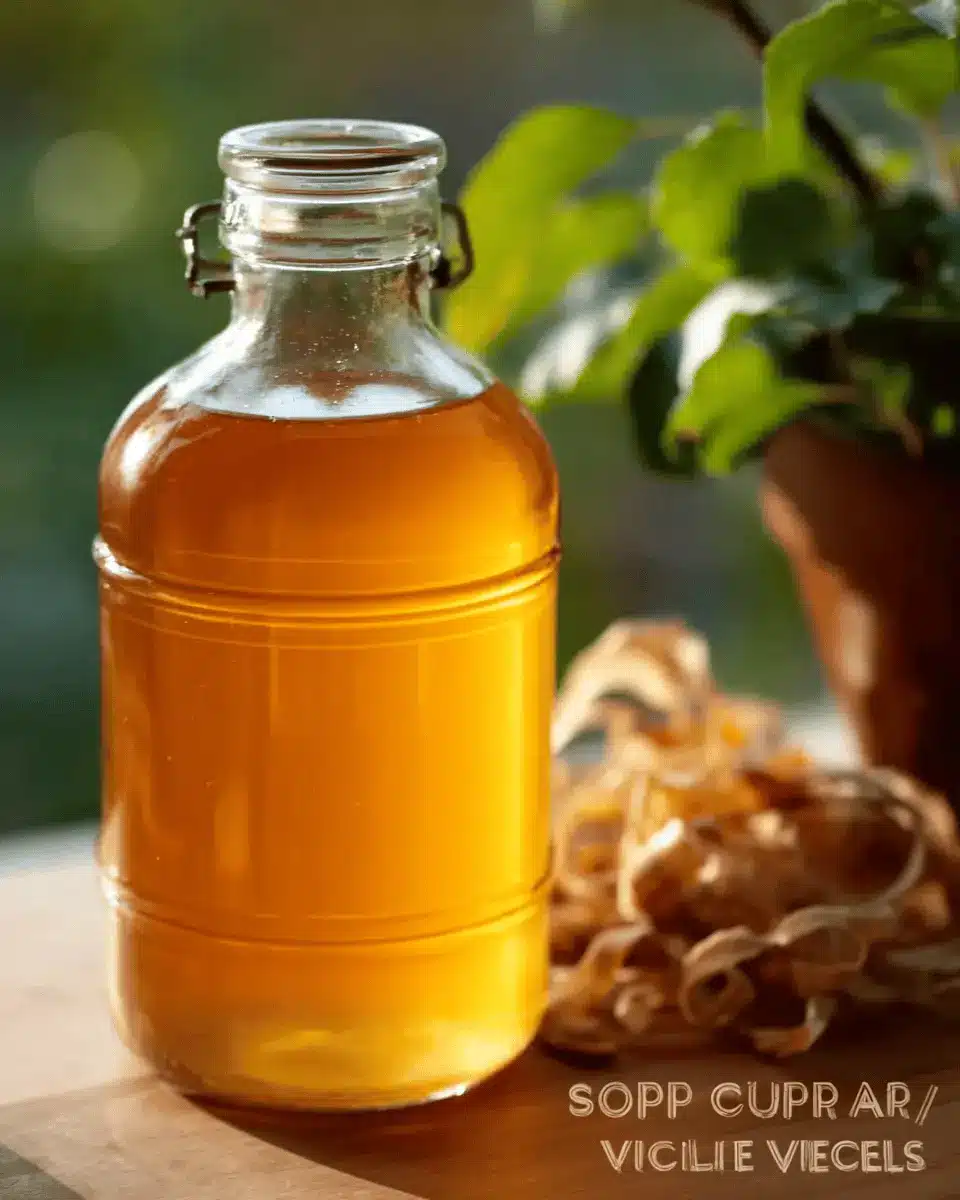
Apple cider vinegar has grown from a household staple to a trendy ingredient in wellness circles, and for good reason! When you learn how to make apple cider vinegar from scraps, you're not just crafting a flavorful condiment but also embracing a sustainable lifestyle. This homemade version is cheaper and free from the additives often found in store-bought varieties.
Why is homemade apple cider vinegar a game changer?
Making your own apple cider vinegar is a delightful process that inspires creativity in the kitchen. You can use leftover apple peels and cores that would typically end up in the trash, allowing you to minimize food waste and stretch your grocery budget. Studies have shown that homemade vinegar retains beneficial minerals and enzymes, offering both health and culinary perks source.
Not only is it versatile in recipes—from salad dressings to marinades—it also serves as a natural cleaning agent. Imagine knowing exactly what’s in your vinegar and how it's been made! Plus, you can experiment with different fruits and flavors, making your vinegar-making journey as unique as you are.
So, ready to dive into the process? You'll find that learning how to make apple cider vinegar from scraps is as rewarding as it is delicious!

Ingredients for Homemade Apple Cider Vinegar
Essential ingredients for this recipe
Creating your own apple cider vinegar at home is not only simple but also a delightful way to utilize apple scraps. Here’s what you need:
- Apple peelings or cores: These are the stars of the show! Gather as many as you can from your kitchen.
- Sugar: Use 1 tablespoon of sugar for every cup of water you plan to add. Sugar helps kickstart the fermentation process!
- Water: Fresh, filtered water is ideal for this recipe to ensure a clean taste.
- Glass jar: A quart-sized jar works great, but feel free to scale up if you’re ready for a bigger batch.
Importance of using organic apples
When learning how to make apple cider vinegar, opting for organic apples is crucial. This choice helps avoid pesticides and chemicals that can linger on the peels. Since we're using the peels in this recipe, going organic not only promotes a healthier product but also enhances the flavor and quality of your homemade vinegar. Plus, it’s better for the environment! Using organic ingredients can help you feel good about what you're putting into your body. So, the next time you’re at the market, consider picking organic apples for this delicious project. Your taste buds will thank you!
Step-by-Step Preparation of Apple Cider Vinegar
Creating your own homemade apple cider vinegar can be a fun and rewarding experience, especially when you're using scraps that might otherwise go to waste. Want to learn how to make apple cider vinegar from scraps? Let’s dive into the process!
Gather Your Apple Scraps
Start by collecting apple scraps—peelings and cores—after you've enjoyed some delicious apples. This is a great way to reduce waste and make something valuable. You don’t need fancy apples; slightly bruised ones work too, as long as they aren’t rotten. Just give them a good wash to remove any residues, especially if they aren't organic.
Create the Sugar Water Mixture
For fermentation to take place, you’ll need a sugar-water mixture. Mix 1 tablespoon of sugar for every 1 cup of water used. Stir it until the sugar is mostly dissolved. This mixture fuels the fermentation process, as the natural yeasts will eat the sugar, transforming it into vinegar. If you're curious about which sugar is best, organic cane sugar is a popular choice, and it’s readily available online.
Combine the Apple Scraps and Sugar Water
Fill a clean glass jar about three-quarters full with your apple scraps. Then, pour the sugar water over the scraps until they’re fully submerged, but leave some space at the top to prevent overflow during fermentation. It’s crucial that the scraps are under the liquid to avoid mold. If they float, consider using fermenting weights to keep them submerged.
Cover and Store the Jar
Cover your jar loosely with a coffee filter or a piece of fabric secured with a rubber band. This setup allows air in while keeping flies out. Store your jar in a warm, dark place for about two weeks. You might want to stir the mixture occasionally, and if you notice brown scum, just skim it off—it’s perfectly normal.
Monitor Fermentation Progress
After the two-week mark, the mixture should smell pleasantly fruity. At this stage, it’s time to strain out the apple scraps using a fine mesh strainer or cheesecloth. The remaining liquid is your vinegar "starter." Don’t throw away those scraps just yet—consider composting them or feeding them to your chickens!
Let It Ferment Again
Now, set the strained liquid aside for another 2-4 weeks for the second fermentation. During this time, give it a taste test. It should start developing that tangy taste characteristic of vinegar. If it’s not quite there yet, be patient and let it ferment a bit longer.
Bottle and Store Your Vinegar
Once you’re satisfied with the flavor, it’s time to bottle your homemade apple cider vinegar. Transfer it into a clean bottle, ensuring that it’s sealed well. This vinegar can last for months without going bad. If a gelatinous blob forms at the top, congratulations! You’ve created a vinegar “mother,” which can be used to make future batches.
With just a little effort, you can enjoy your own homemade apple cider vinegar for cooking, cleaning, or even using in health tonics. Now that you know how to make apple cider vinegar, get ready to enjoy your fruity, tangy creation!
Variations of Apple Cider Vinegar
Apple cider vinegar with honey
If you want to add a touch of sweetness to your homemade vinegar, consider using honey instead of sugar. While this may slow down the fermentation process a bit, the flavor is worth it. Not only does it create a unique twist on the traditional taste, but honey is rich in antioxidants and has antibacterial properties. Keep in mind, though, that the beneficial organisms will consume most of that sugar during fermentation, leaving you with a delightful, tangy vinegar perfect for salad dressings or marinades.
Exploring other fruit scraps
Don’t stop with just apple peels! When learning how to make apple cider vinegar, feel free to explore using scraps from other fruits like pears or peaches. These can add exciting flavors and nutrients to your vinegar. Just follow the same simple steps as with apple scraps, and soon you’ll have a variety of homemade vinegars to complement countless dishes. Plus, this not only reduces waste but adds versatility to your culinary repertoire!
Cooking Tips and Notes for Apple Cider Vinegar
Best practices for fermentation
When learning how to make apple cider vinegar, patience is key. Keep your jar in a warm, dark place, ideally between 60-80°F (15-27°C). Use a breathable cover, such as a coffee filter, to allow airflow while keeping dust out. Stir the mixture every few days to encourage fermentation and prevent scum build-up. If you notice any brownish or greyish film, just skim it off without worry.
How to troubleshoot common issues
Fermentation can throw curveballs. If there’s an unpleasant smell, it may indicate spoilage; discard and start fresh. Trouble achieving that tangy flavor? Simply let it ferment longer—great vinegar takes time! Consider adding a bit of raw apple cider vinegar for a quicker kickstart. If your scraps float, use fermenting weights to keep them submerged.
For additional tips, check out sources like The Kitchn and Food52. Enjoy creating your own delicious apple cider vinegar!
Serving Suggestions for Apple Cider Vinegar
Using Vinegar in Salads
Apple cider vinegar is a fantastic addition to your salad dressings. Its tartness can elevate the flavors of greens and other veggies. Mix it with olive oil, a touch of honey, mustard, and garlic for a zesty vinaigrette that’ll have your taste buds dancing. Don’t forget, a splash can also brighten up a creamy dressing, making it lighter and more refreshing!
Incorporating It into Marinades
If you’re wondering how to make apple cider vinegar work its magic in marinades, you’re in luck! Combine it with your favorite herbs, spices, and a sweet element like maple syrup for a deliciously tangy marinade for chicken, tofu, or beef. Just let your protein soak for a few hours, and you’ll notice the tenderizing effects and enhanced flavor!
For more creative recipes that utilize apple cider vinegar, check out this guide on its benefits and uses!
Time Breakdown for Apple Cider Vinegar
Preparation Time
The prep time for this delightful apple cider vinegar is just 10 minutes. That's right! In almost no time at all, you'll have your apple scraps ready to start their fermenting journey. Just fill your jar with peelings and cores, mix in some sugar, and cover with water.
Fermentation Time
Now comes the magical part—fermentation! You'll need to give your mixture 4 weeks to develop its tangy flavor. You'll check in on it, maybe stir it a few times, but otherwise, you just let it do its thing in a warm, dark place.
Total Time
In total, from preparation to completion, you're looking at around 672 hours and 10 minutes. While that may sound like a long time, remember that much of that is hands-off—it's simply nature doing her work! After the waiting period, you’ll be rewarded with homemade apple cider vinegar that can elevate your cooking and cleaning experiences.
For more tips on how to make apple cider vinegar efficiently, check out resources from The Prairie Homestead!
Nutritional Facts for Apple Cider Vinegar
Calories
Apple cider vinegar is incredibly low in calories, with roughly 3 calories per tablespoon. This makes it a fantastic addition to your meals without adding extra calories to your diet. For anyone looking to lighten up their dressings or marinades, this is an ideal option.
Health Benefits
Using apple cider vinegar has a variety of potential health benefits. Research suggests it may support:
- Weight management: Some studies indicate that it can help with feelings of fullness.
- Blood sugar control: It might assist in lowering blood sugar levels after meals, making it a great choice for those monitoring their glucose.
- Digestive health: The probiotics formed during fermentation could promote a healthy gut.
To dive deeper into these benefits, check out resources from experts at Healthline and the Mayo Clinic. Exploring these facts can enrich your knowledge as you learn how to make apple cider vinegar from scraps! Plus, it’s always nice to know that your homemade condiment is not just tasty but packs a nutritional punch!
FAQs about Apple Cider Vinegar
How do I know when my vinegar is ready?
You’ll know your homemade apple cider vinegar is ready when it has that unmistakable vinegary smell and tang. After the initial two weeks of fermentation, strain the apple scraps and let the liquid sit for an additional 2-4 weeks. If it still tastes a bit sweet, give it more time—patience is key! A vinegar "mother," a gelatinous blob that may form on the surface, indicates successful fermentation and can be reused to jump-start future batches.
Can I reuse apple scraps for a new batch?
While it’s not advisable to reuse your apple scraps for another batch of vinegar, you can certainly compost them, or even feed them to your chickens! They’ll appreciate the treat while reducing kitchen waste, making your cooking process even more sustainable.
What are the uses of apple cider vinegar in the kitchen?
Apple cider vinegar is incredibly versatile! Use it in salad dressings, marinades, or as a natural remedy for digestion. It’s also great for pickling vegetables. If you're curious about other uses beyond the kitchen, check out this comprehensive guide on the benefits of vinegar for health and cleaning. Embrace the fruity tang in every aspect of your culinary adventures!
Conclusion on Homemade Apple Cider Vinegar
Creating your own apple cider vinegar from scraps is a rewarding and sustainable practice. Not only do you cut down on food waste, but you also gain a versatile ingredient for your cooking and cleaning needs. Now that you know how to make apple cider vinegar, give it a try and embrace the delicious benefits it brings!
For more creative uses for your homemade vinegar, check out our guide on vinegar-based solutions.

How to Make Apple Cider Vinegar from Scraps
Equipment
- Glass jar
Ingredients
- 1 quart Apple peelings or cores Use organic to avoid pesticides.
- 1 tablespoon Sugar Per cup of water used.
- 2-4 cups Water Adjust based on jar size.
- Glass jar Make larger quantities if desired.
Instructions
- Fill the glass jar ¾ of the way with the apple peels and cores.
- Stir the sugar into the water until it’s mostly dissolved, and pour over the apple scraps until they are completely covered. Leave a few inches of room at the top of the jar.
- Cover loosely with a coffee filter or fabric scrap secured with a rubber band and set in a warm, dark place for around two weeks.
- Give it a stir every few days. If any brownish/greyish scum develops on the top, skim it off.
- Once two weeks has passed, strain the scraps from the liquid.
- Set the strained liquid aside for another 2-4 weeks until it has a tangy smell and taste.
- Cap and store your vinegar once happy with the taste. It won’t go bad.
- If a gelatinous blob develops, congratulations! You have created a vinegar mother.
- Use your homemade vinegar just like storebought vinegar for cooking, cleaning, and more.


Leave a Reply