
Introduction to Slice and Bake Cookies
When it comes to cookie-making, nothing beats the convenience of slice and bake cookies. These delightful treats combine the joy of homemade baking with an effortless preparation method, making them a go-to option for busy professionals craving a sweet escape. Have you ever found yourself short on time but still longing for that fresh-baked goodness? Slice and bake cookies allow you to make the dough ahead of time, chill it, and slice off just the right amount whenever the craving hits.
Why Choose Slice and Bake Cookies?
Here are a few reasons to fall in love with slice and bake cookies:
-
Preparation Flexibility: You can prepare the dough well in advance, storing it in the fridge or freezer for those unexpected guests or late-night snacks. Imagine showing up at a friend's gathering with a platter of freshly baked cookies while hardly lifting a finger!
-
Perfectly Portions: Once the dough is chilled, cutting it into uniform slices ensures even baking, preventing any cookies from being left undercooked or burnt. Plus, the ability to bake just one batch or the entire log means less waste!
-
Customization: Want to personalize your cookies? You can easily mix in your favorite toppings, like colorful sprinkles or chunks of chocolate, creating a unique flavor experience every time.
If you're eager to dive right into this delightful recipe, check out the full instructions below and watch the video tutorial for helpful tips!
Ingredients for Slice and Bake Cookies
Creating delicious slice and bake cookies is all about using the right ingredients. Here’s a breakdown to help you gather everything you need for this treat.
Essential Ingredients You’ll Need
To craft your slice and bake cookies, here are the essentials:
- Butter: 1 cup of unsalted butter, softened, forms the creamy base.
- Sugars: Combine ½ cup of granulated sugar with ¼ cup of packed light brown sugar for that perfect sweetness.
- Egg Yolk: One large egg yolk adds richness and helps the cookies hold together.
- Flavorings: A teaspoon of vanilla extract is a must; consider adding ½ teaspoon of almond extract for a nutty twist.
- Salt: Just ½ teaspoon helps to enhance all those sweet flavors.
- Flour: You’ll need 2 ¼ cups of all-purpose flour to give the cookies structure.
Optional Add-ins to Mix It Up
Feel free to get creative! Here are some fun add-ins that can elevate your slice and bake cookies:
- Nonpareils: 2 ½ tablespoons of colorful nonpareils can add a festive touch.
- Chocoholic’s Choice: Consider folding in mini chocolate chips or chopped nuts for extra texture.
- Spices: A dash of cinnamon or nutmeg can provide a warm flavor profile, great for cozy gatherings.
Have fun experimenting with these ingredients to make the cookies uniquely yours! For tips on measuring ingredients perfectly, check out this guide on how to measure flour.
Step-by-Step Preparation for Slice and Bake Cookies
Making slice and bake cookies is not just about enjoying a sweet treat—it's a delightful experience! With just a few simple steps, you’ll have mouthwatering cookies ready for every occasion. Let's dive into the preparation process together!
Creaming the Butter and Sugars
The first step in preparing your slice and bake cookies is creaming together the softened butter and sugars. Start with 1 cup of softened unsalted butter, ½ cup of sugar, and ¼ cup of packed light brown sugar in a large mixing bowl. Using an electric mixer, beat these ingredients on medium speed until they turn light and fluffy—this usually takes about 2-3 minutes. The creaming process is vital because it incorporates air into the dough, which leads to that soft, chewy texture we all love.
Mixing in the Egg Yolk and Extracts
Once you've achieved that beautiful, creamy mixture, it’s time to add flavor! Mix in 1 large egg yolk, which adds richness and helps bind everything together. Then, add ½ teaspoon of salt, 1 teaspoon of vanilla extract, and if you’re feeling fancy, ½ teaspoon of almond extract. Beat the mixture until it's well combined. This is a great moment to savor the delicious aroma of vanilla wafting through your kitchen!
Gradually Adding the Flour
Next up is the flour! With your mixer set to low speed, gradually add in 2 ¼ cups of all-purpose flour until it’s fully incorporated. You might notice the dough looking a bit crumbly at this stage—that's completely normal. Just use a spatula to gently scrape down the sides and mix until it forms a uniform dough. Remember, overmixing here might toughen your cookies, so be gentle!
Incorporating Nonpareils and Shaping the Dough
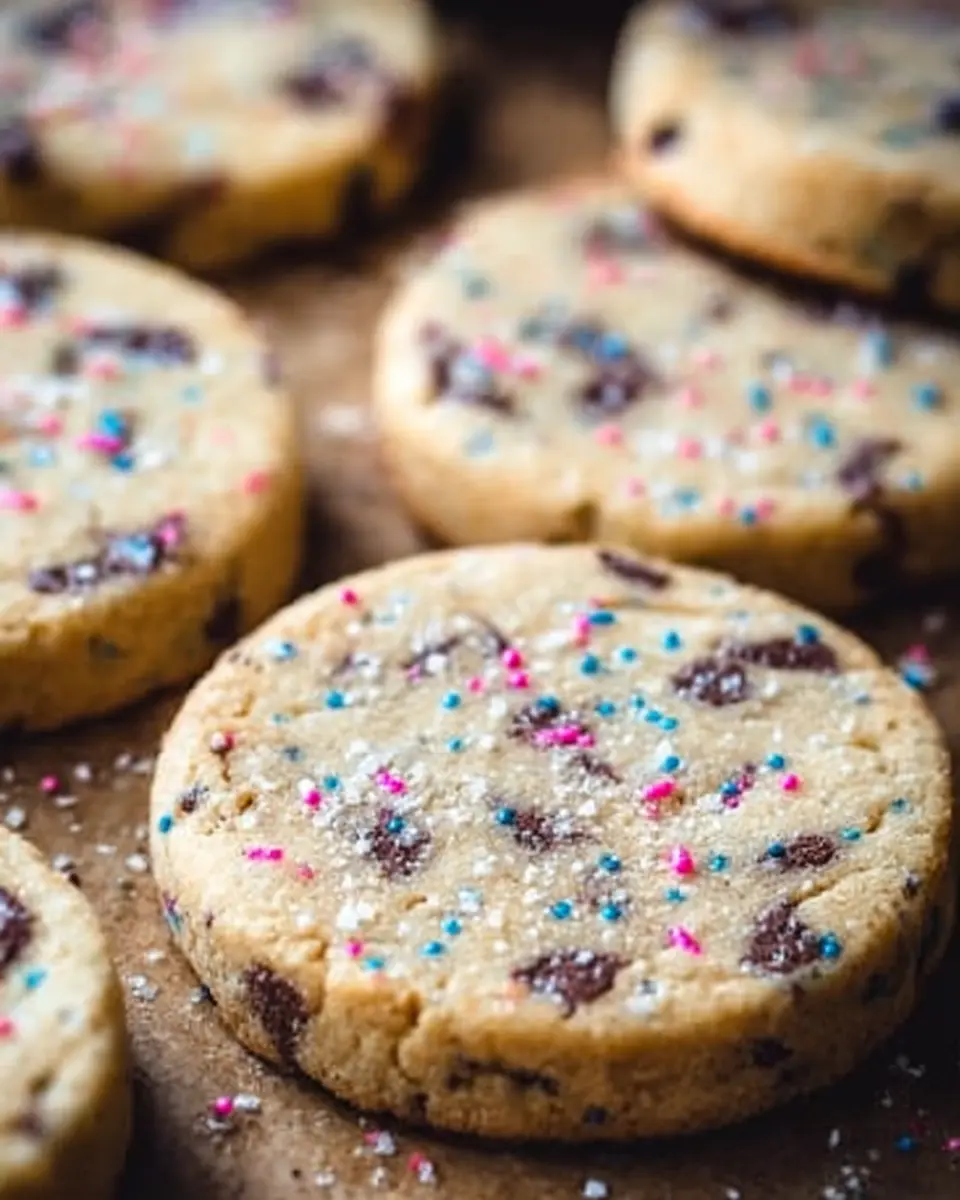
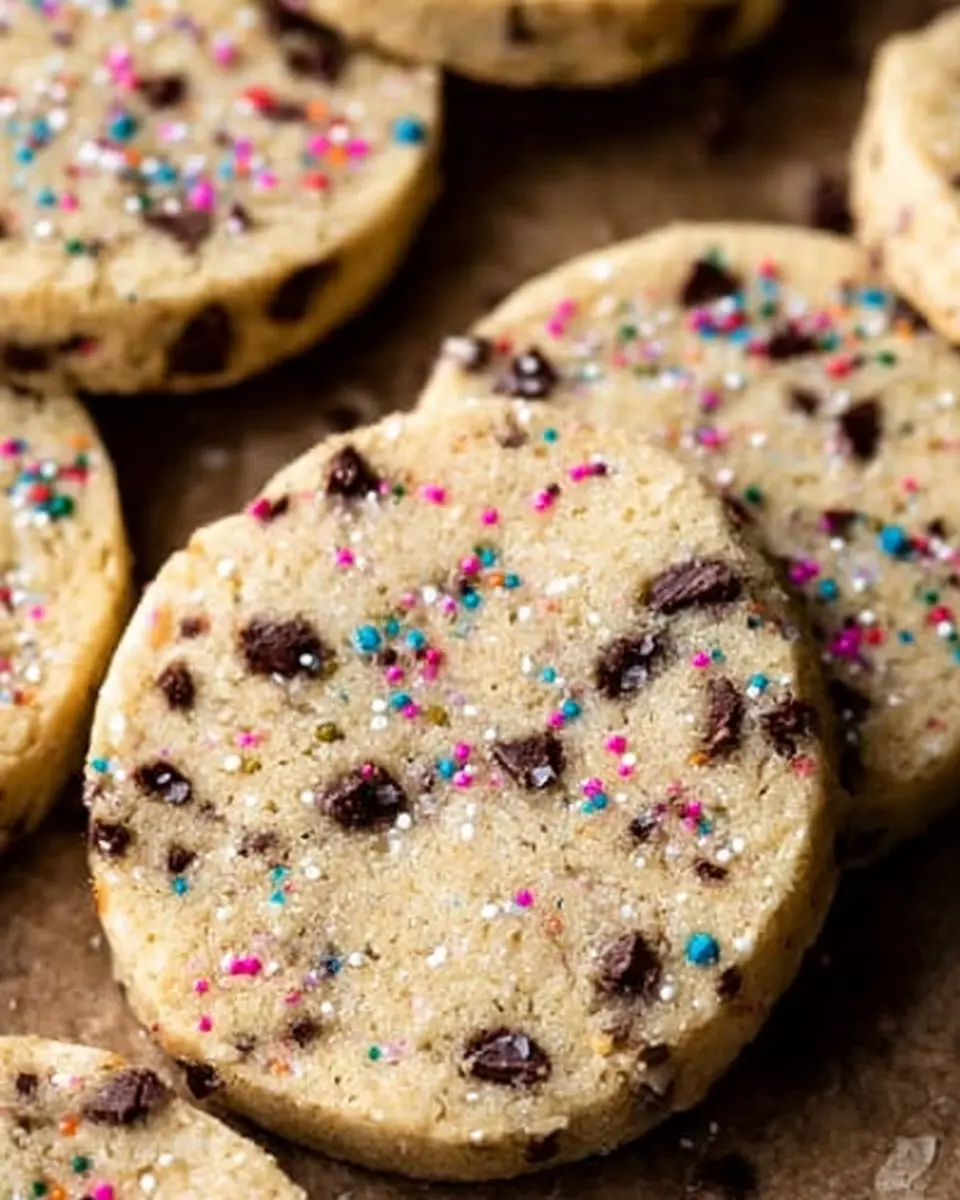
If you're opting to add a splash of color, fold in 2 ½ tablespoons of colorful nonpareils into your cookie dough at this point. Keep in mind that you shouldn’t overwork the dough as this could cause the colors to bleed. Now, divide the dough into two equal parts and shape each into a log about 2 inches in diameter. Don’t worry if it’s not perfect—just use wax paper to help mold it, which will give you nice rounded edges.
Chilling the Dough Logs
Now comes the patience-testing part: chilling the dough! Wrap each log tightly in wax paper or plastic wrap and refrigerate for at least 2-3 hours. Chilling helps solidify the butter, ensuring that your cookies hold their shape while baking. An insider tip? For perfectly round cookies, consider using a paper towel roll as a mold—you’ll thank yourself later!
Baking the Cookies
After the dough has chilled, preheat your oven to 350°F (175°C) and line a cookie sheet with parchment paper. Remove one dough log from the fridge and use a sharp knife to slice it into ¼-inch pieces. Place these slices about 1 inch apart on your prepared baking sheet. Bake for 10-12 minutes or until the edges are just golden brown. Here’s the best part: your home will soon be filled with delicious cookie scents!
Let your cookies cool on the baking sheet before serving. If you like, dip them in chocolate for an extra treat. Enjoy your batch of slice and bake cookies—a perfect way to sweeten any gathering!
Variations on Slice and Bake Cookies
Colorful Nonpareils Twist
Transform your slice and bake cookies into a dazzling treat by mixing in colorful nonpareils! This simple addition will not only brighten your cookies but also add a delightful crunch. Try different color combinations to match the occasion—pastels for spring, bold hues for birthdays, or festive colors during the holidays. It’s a fun way to get creative with a classic recipe!
Nutty Delight Additions
For those who crave a heartier texture, consider adding nuts to your slice and bake cookies. Chopped walnuts or pecans bring a wonderful crunch and a rich flavor that pairs beautifully with the sweet dough. If you want a gourmet spin, toast the nuts beforehand to enhance their flavor. Remember to chop them finely for even distribution in the cookie dough.
These variations ensure your slice and bake cookies are never boring—experiment and find your favorite twist!
Cooking Tips and Notes for Slice and Bake Cookies
Avoiding Flat Cookies
To ensure your slice and bake cookies hold their shape, it's essential to chill the dough properly. Use a paper towel roll, as I'll show you in the video, to keep the logs perfectly round while they chill. This simple trick prevents the dough from flattening out and keeps your cookies looking as delicious as they taste!
How to Keep Your Cookies Fresh
For optimal freshness, store your slice and bake cookies in an airtight container at room temperature. They can stay delightful for about a week. If you want to maintain that optimal taste, consider freezing the cookie dough logs. Wrap them tightly in plastic wrap and freeze for up to three months; just slice and bake whenever a cookie craving strikes! For tips on storage and more, visit The Kitchn.
Serving Suggestions for Slice and Bake Cookies
Pairing with Milk or Coffee
What’s better than a fresh-baked slice and bake cookie? Enjoying one with a cold glass of milk or a cozy cup of coffee! The creaminess of milk complements the buttery sweetness of the cookies beautifully. If you're a coffee lover, consider pairing your cookies with a rich espresso or a creamy latte. The bold flavors of coffee enhance the sweetness and balance the richness.
Creative Presentation Ideas
Want to impress your guests? Arrange your slice and bake cookies on a decorative platter and sprinkle some colorful nonpareils on top for a festive touch. You could even stack them in a mason jar tied with twine for a charming gift. For a fun twist, serve them alongside homemade ice cream sundaes or as part of a DIY dessert bar. Your creativity can turn these simple cookies into a show-stopping treat!
Time Breakdown for Slice and Bake Cookies
Preparation Time
Getting started on your slice and bake cookies takes just 15 minutes. Perfect for when you're craving a delicious homemade treat but don't want to spend hours in the kitchen!
Chill Time
After mixing, it's time to chill the dough for at least 2 hours. This step is crucial for achieving perfectly shaped cookies that won’t spread too much while baking.
Total Time
Including preparation and chilling, the total time for this delightfully easy recipe is about 2 hours and 27 minutes. But don’t worry, most of that is hands-off time while you wait for the dough to cool!
By breaking the process down like this, you can see just how manageable these slice and bake cookies can be, making them an excellent option for any occasion. For tips on perfecting your cookie-making skills, check out this guide on cookie baking!
Nutritional Facts for Slice and Bake Cookies
Calories per Cookie
Indulging in a slice and bake cookie has never felt so satisfying! Each delicious cookie contains approximately 114 calories, making them a sweet treat that's easy to manage within your daily caloric goals.
Key Nutritional Components
These cookies not only satisfy your sweet cravings but also provide essential nutrients:
- Carbohydrates: 13g
- Protein: 1g
- Fat: 7g (including 4g saturated fat)
- Cholesterol: 22mg
- Sodium: 40mg
- Sugar: 5g
In moderation, these delightful slice and bake cookies can fit into a balanced diet. For more insights on cookie ingredients, check out Healthline for a deeper dive into nutritional benefits.
Enjoy baking and savoring the delightful flavors of your homemade cookies!
FAQs about Slice and Bake Cookies
Can I Freeze the Dough?
Absolutely! Slice and bake cookie dough is perfect for freezing. Once you've formed the logs, wrap them tightly in plastic wrap or aluminum foil and store them in an airtight container. They can be frozen for up to three months. When you’re ready to bake, just slice off the amount you need and pop them into the oven—no need to thaw!
What’s the Best Way to Store Cookies?
To keep your slice and bake cookies fresh, store them in an airtight container at room temperature for up to a week. If you want to keep them longer, consider freezing the baked cookies in a similar fashion. Just ensure they’re fully cooled before packing them away to maintain their texture.
How Can I Customize My Cookies?
The options for customizing your slice and bake cookies are endless! Try adding:
- Chopped nuts (walnuts or pecans)
- Different flavored extracts (like peppermint or coconut)
- Chocolate chips or chunks
- Dried fruits for a twist
Experimenting is part of the fun, so don’t hesitate to get creative with your flavor combinations!
Conclusion on Slice and Bake Cookies
In conclusion, slice and bake cookies are a delightful solution for busy bakers who crave homemade treats. With minimal effort and endless customization options, these cookies can be prepped ahead and baked when cravings strike. Try them with various mix-ins and enjoy a sweet moment anytime!

Slice and Bake Cookies
Equipment
- electric mixer
- cookie sheet
- parchment paper
- wax paper
- sharp knife
Ingredients
- 1 cup unsalted butter softened
- ½ cup sugar
- ¼ cup light brown sugar tightly packed
- 1 large egg yolk
- ½ teaspoon salt
- 1 teaspoon vanilla extract
- ½ teaspoon almond extract optional
- 2 ¼ cups all-purpose flour
- 2 ½ Tablespoons colorful Nonpareils optional
Instructions
- Combine butter and sugars in a large bowl and use an electric mixer to beat until creamy.
- Add egg yolk and stir well.
- Add salt, vanilla extract, and almond extract (if using). Beat until well-combined.
- With mixer on low-speed, gradually add flour until completely combined. Dough may be crumbly.
- Add nonpareils (if using) and fold into dough.
- Divide dough into 2 parts and work into a 2" wide log shape. Transfer to refrigerator to chill.
- Preheat oven to 350ºF (175ºC) and line a cookie sheet with parchment paper.
- Remove one cookie dough log from the refrigerator and use a sharp knife to cut into ¼" slices.
- Place slices on prepared cookie sheet about 1" apart and bake for 10-12 minutes until edges are golden brown.
- Allow to cool on baking sheet before serving. Optional: dip cooled cookies in chocolate and top with sprinkles.


Leave a Reply