
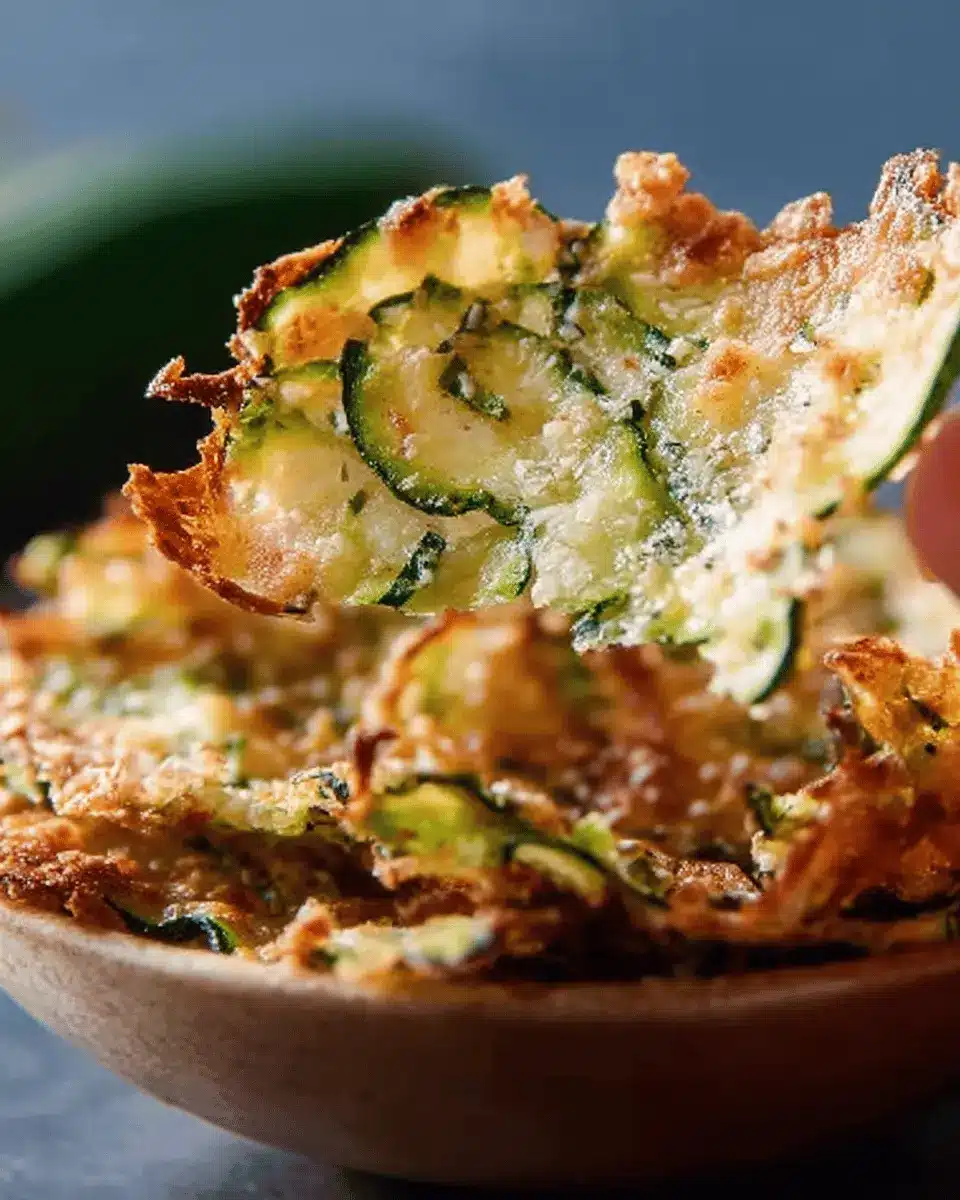
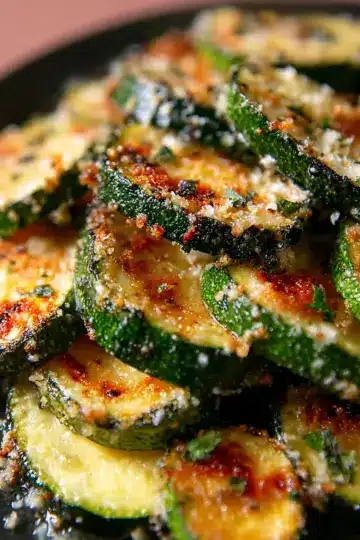
Introduction to Zucchini Cheese Crisps
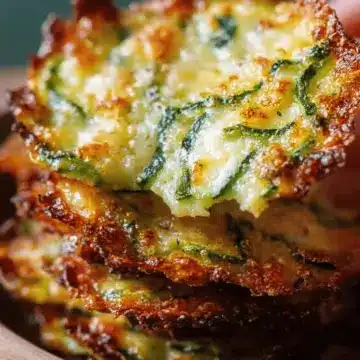
Are you searching for a creative twist on your snacking habits? Say hello to zucchini cheese crisps! These little delights are not just snacks; they can be a game changer for your appetizer table or movie night spread. Combining the mild flavor of zucchini with your favorite melty cheese results in a crispy, crunchy treat that is not only satisfying but also keto-friendly.
Why Zucchini Cheese Crisps are a Game Changer for Homemade Snacks
If you're like most young professionals, you probably want something quick, tasty, and healthier than traditional chips. That’s where zucchini cheese crisps come in. With only two ingredients—grated zucchini and your choice of cheese—they are unbelievably easy to whip up. The process takes just about 10 minutes, making them the perfect solution for last-minute gatherings or when you're simply craving a munch.
Moreover, zucchini is packed with vitamins and minerals, while the cheese provides protein, making these crisps a more wholesome option than many processed snacks on the market. Plus, did you know that incorporating vegetables into snacks can help you meet your daily quota? For a little inspiration on incorporating healthy eating into your routine, check out Healthline for expert dietary tips.
So, are you ready to dive into this delicious recipe? Let’s get started!
Ingredients for Zucchini Cheese Crisps
Essential Ingredients for the Crisps
To whip up these tasty zucchini cheese crisps, you’ll need just two main components:
- 1 cup grated zucchini: This is the star of the show! Be sure to squeeze out as much moisture as possible to achieve that lovely crispy texture.
- 1 cup hard but melty cheese: Choose from varieties like gruyere, cheddar, parmesan, or swiss. Each will bring its own unique flavor profile, adding to the deliciousness of your crisps.
Optional Enhancements for Extra Flavor
If you're feeling adventurous, try these enhancements to elevate your zucchini cheese crisps:
- Garlic powder: A pinch of garlic adds depth with minimal effort.
- Dried herbs: Oregano or thyme sprinkle in an aromatic touch.
- Chili flakes: For those who enjoy a kick, a dash will do wonders.
Don't hesitate to mix and match these additions to craft a flavor profile that reflects your palate! For more ideas on seasoning, check out this guide on herbs and spices. Enjoy the process of creating something delicious!
Preparing Zucchini Cheese Crisps
Creating zucchini cheese crisps is a fun and easy kitchen project that packs bold flavors into a crispy, crunchy bite. Perfect for snacking or as a delicious appetizer, these cheese crisps are universally appealing. Let’s dive into how to prepare them step-by-step!
Grating and Draining the Zucchini
Start by choosing fresh zucchinis, preferably firm ones, as they’ll provide the best texture for your crisps. Grate 1 cup of zucchini using a box grater, ensuring the shavings are fine. Place a cheesecloth or a clean dish towel over a bowl and transfer the grated zucchini into it.
Now comes the fun part—draining! Twist the cloth to squeeze out as much moisture as possible. The drier your zucchini, the crunchier your crisps will be. It’s a little bit like making a zero-waste dish: you get all the flavor without the sogginess. Consider checking out this guide on zucchini preparation for additional tips.
Mixing the Zucchini with Cheese
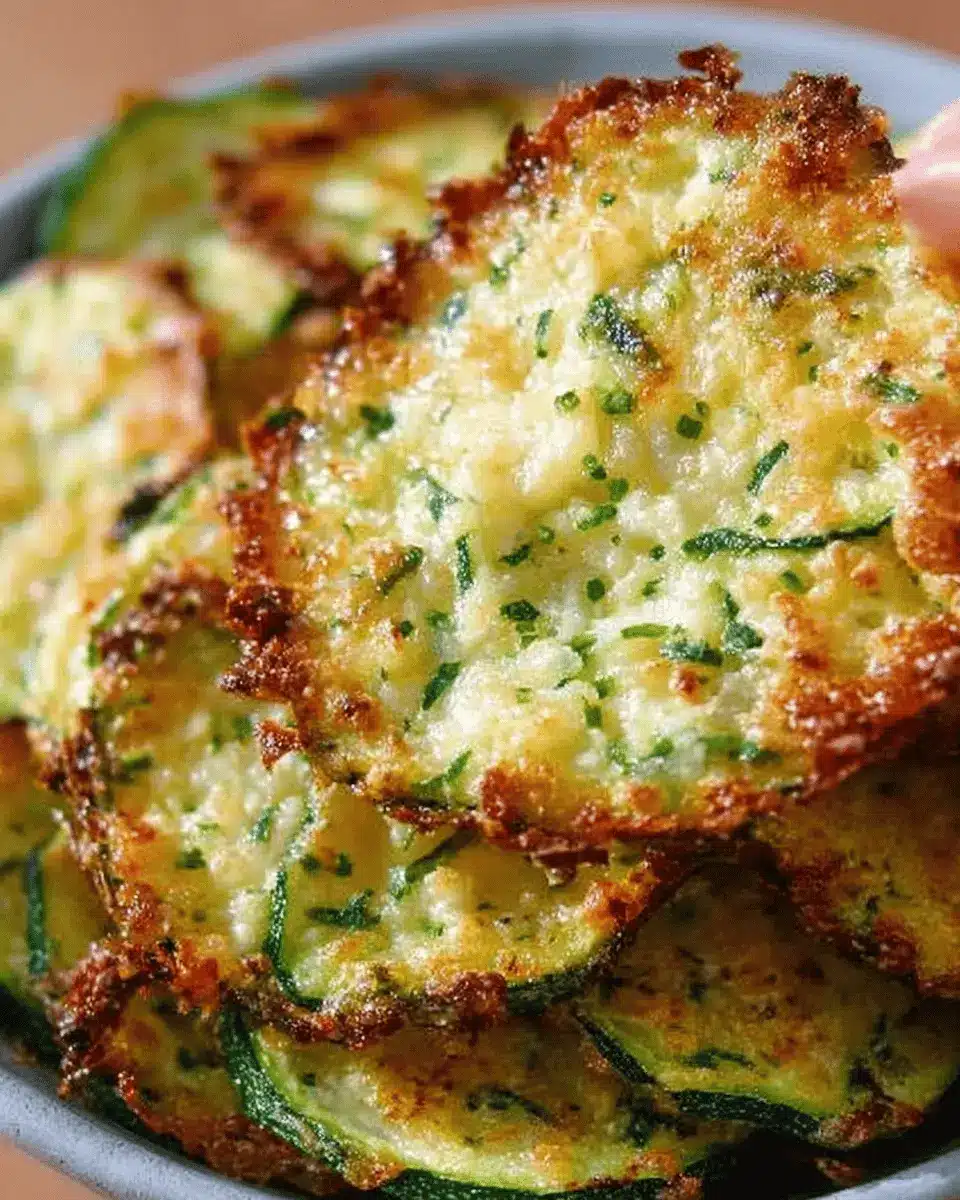
Once you’ve successfully drained your zucchini, it’s time to incorporate the cheese. Choose a hard yet melty variety—Gruyere, cheddar, or even Parmesan work great! Grate about 1 cup of your cheese of choice and mix it into the zucchini bowl. Stir until the two ingredients are well combined, ensuring that the cheese is evenly distributed throughout the zucchini.
This mixture is not just tasty; it’s also packed with protein and calcium, making it a great option for a snack. The cheesy flavor truly elevates the humble zucchini!
Forming the Cheese Crisps on the Baking Sheet
Next, you’ll want to prepare a baking sheet. Line it with parchment paper to avoid any sticking issues—trust me, it makes clean-up a breeze!
Using your hands or a tablespoon, scoop out about 1 tablespoon of the zucchini-cheese mix and form small mounds on the baking sheet, leaving enough space in between each mound for the cheese to spread as it melts during cooking. Make sure they're evenly spaced; this helps ensure they crisp up nicely.
Broiling to Crispy Perfection
The next step is where the magic happens! Place the baking sheet in the top third of your oven and set it under the broiler on low. Keep a close eye on the crisps as they cook; the high heat can make them go from perfectly golden to burnt in mere moments.
You’ll know they’re ready when the edges turn brown and crispy—a sure sign of what’s to come!
Cooling and Serving Tips
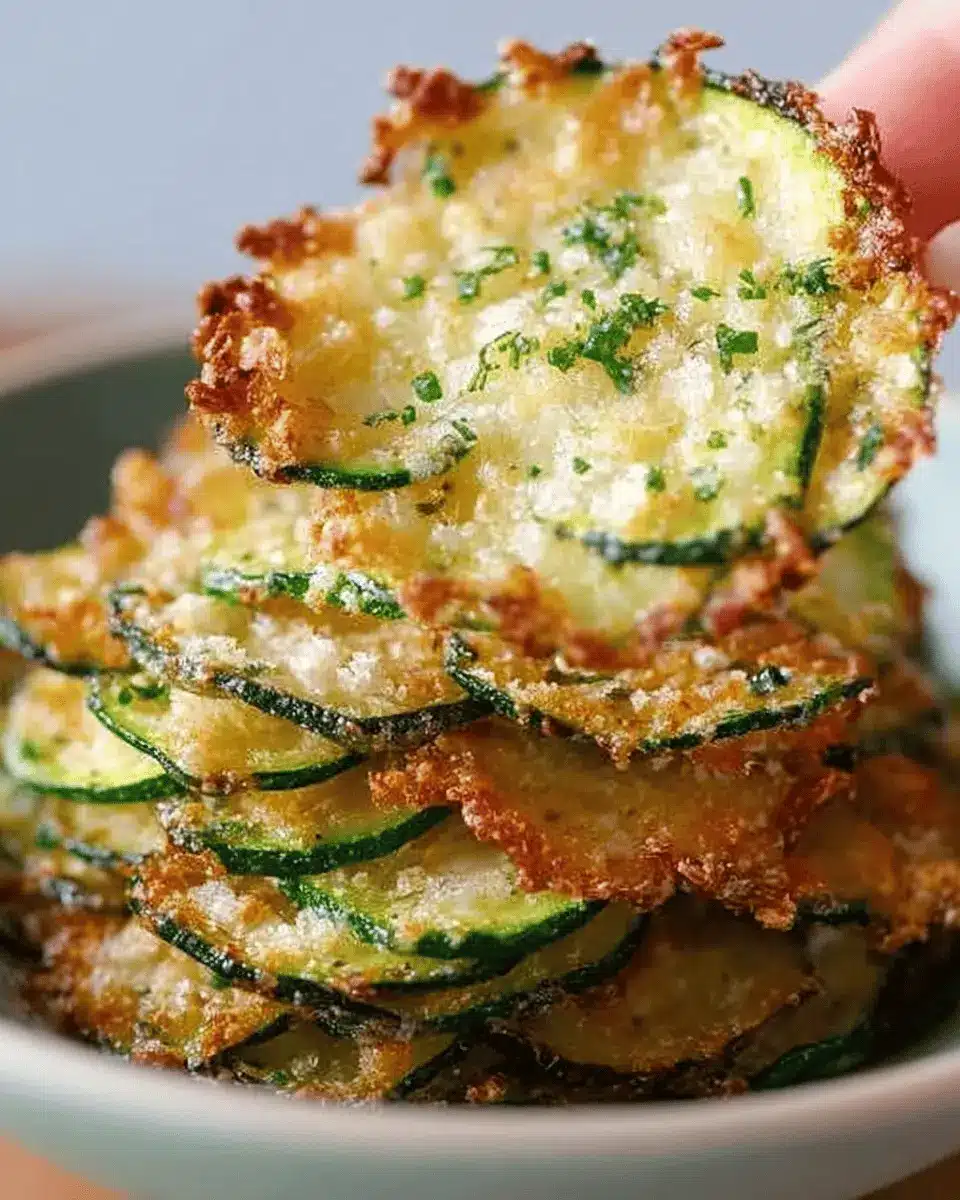
Once your zucchini cheese crisps are done broiling, carefully remove the baking sheet from the oven. Use the parchment paper to lift them off the sheet and transfer to a cooling rack. This allows air to circulate around the crisps, helping them maintain their crunch.
Let them cool for a couple of minutes and then transfer to a paper-towel-lined plate to absorb any excess grease. This simple step helps achieve that light, crispy finish everyone loves. Serve them warm as-is, or with a dipping sauce like marinara or a zesty yogurt dip for an extra flavor boost.
Enjoy your homemade decadence, and watch them disappear faster than you can say "zucchini cheese crisps!"
Variations on Zucchini Cheese Crisps
Adding spices for flavor variations
Elevate your zucchini cheese crisps by experimenting with spices! A dash of paprika can lend a smoky warmth, while Italian seasoning adds an aromatic twist. For a kick, consider mixing in crushed red pepper flakes or garlic powder. Even a hint of cumin can offer an exotic flair. The beauty of these crisps is it’s easy to customize; simply adjust the seasonings to match your palate. Why not try a blend of your favorites?
Mixing in different cheese types
While cheddar is a classic choice for your zucchini cheese crisps, don’t hesitate to get creative with cheese variations. Mixing gruyere for its nutty flavor or using parmesan for an added salty touch can take your crisps to another level. Have some feta on hand? Crumble it into the mix for a tangy surprise! The combination of flavors can enhance your appetizer game, keeping things exciting and delicious every time you whip them up.
Cooking Tips and Notes for Zucchini Cheese Crisps
Ensuring Maximum Crispiness
To achieve the perfect crunch in your zucchini cheese crisps, it's essential to start by removing as much moisture as possible from the grated zucchini. Using a cheesecloth is ideal for this—squeeze it tightly to rid the zucchini of excess liquid. Additionally, leaving enough space between the mounds on the baking sheet allows for optimal air circulation while cooking, enhancing crispiness.
Storage Tips for Leftovers
If you happen to have any zucchini cheese crisps left (though they usually disappear fast!), store them in an airtight container at room temperature. For extra crispiness upon reheating, consider popping them in the toaster oven for a few minutes—this will revive their crunchiness beautifully. Remember, freshness is key for the best flavor and texture!
Serving Suggestions for Zucchini Cheese Crisps
Pairing with Dips and Spreads
You can elevate your zucchini cheese crisps by serving them with various dips. Consider pairing them with guacamole, tzatziki, or a spicy salsa for a flavorful contrast. Hummus is another fantastic option—its creamy texture complements the crispiness beautifully. For something unique, try a garlic aioli or a fresh herb pesto to add a gourmet touch. These dips not only enhance the flavors but also add a delightful creaminess that rounds out the dish.
Using as a Topping for Salads
Another delicious way to enjoy zucchini cheese crisps is as a crunchy topping on salads. Break them into smaller pieces and sprinkle on your favorite greens for added texture. Their cheesy goodness goes great with both hearty salads, like a classic Caesar, and lighter ones, such as a simple arugula and cherry tomato mix. You’ll be amazed at how a handful of these crisps can transform a simple salad into a gourmet experience.
For more inspiration, check out our favorite salad recipes that make the most of ingredients like these crisps here. Enjoy!
Time Breakdown for Zucchini Cheese Crisps
Preparation Time
Ready to whip up some crunchy goodness? The prep time for zucchini cheese crisps is just 5 minutes. That’s right—only five minutes stand between you and cheesy perfection!
Cooking Time
Next up, the cooking time is a quick and crisp 5 minutes under the broiler. Keep a close eye to make sure those edges turn golden brown—it's essential for that perfect crunch.
Total Time
In just 10 minutes, you’ll have delicious, crispy zucchini cheese crisps ready to impress. Perfect for a last-minute appetizer, isn’t it? Give it a try, and you'll be amazed at how easily these delightful bites come together!
For tips on the best cheese varieties for your zucchini cheese crisps, you might want to check out this guide on cheese.
Nutritional Facts for Zucchini Cheese Crisps
When you're considering a snack that's not only tasty but nutritious, zucchini cheese crisps fit the bill perfectly. Here's a quick breakdown of their nutritional value:
Calories
Each serving contains approximately 142 calories. This makes them a great low-calorie option, especially if you’re watching your intake.
Protein
Packed with 10 grams of protein, these crisps can help keep you full longer. It's an ideal choice for a post-workout snack or a mid-afternoon boost.
Fat content
With 11 grams of fat, the healthy fats from cheese can be satiating, ensuring your cravings are kept at bay. Just remember moderation is key!
For more nutrition-related tips, you can check out resources like Healthline or FoodData Central for deeper insights on ingredients used in these delightful zucchini cheese crisps!
FAQs about Zucchini Cheese Crisps
What can I use if I don’t have cheesecloth?
If you're in a pinch and don’t have cheesecloth, don’t fret! You can use a clean kitchen towel or a fine mesh strainer instead. Just make sure that the fabric is thin enough to let the liquid escape while retaining the zucchini. Pressing down firmly will ensure your zucchini cheese crisps turn out nice and crispy!
Can I make these in the air fryer?
Absolutely! Air frying your zucchini cheese crisps can make them even crispier without the need for broiling. Preheat your air fryer to 375°F, then place the zucchini and cheese mixture in small mounds in the basket. Cook for about 8 to 10 minutes, checking frequently until they turn golden brown. You’ll love the results!
Are these suitable for meal prep?
Definitely! These zucchini cheese crisps are great for meal prep. Simply store them in an airtight container in the refrigerator for up to a week. You can re-crisp them by popping them back in the oven or air fryer for a few minutes. They're perfect for snacking or as a topping on salads and dishes throughout the week!
For more tips on meal prepping, consider checking out resources from sites like The Kitchn for inspiration.
Conclusion on Zucchini Cheese Crisps
In just 10 minutes, you can whip up these delicious zucchini cheese crisps that are perfect for any occasion. Their crispy texture and cheesy flavor make them a fantastic guilt-free snacking option. Serve them at your next gathering, and watch everyone go back for seconds! Enjoy!
Zucchini Cheese Crisps
Equipment
- Cheesecloth
- baking sheet
- oven
- Cooling Rack
Ingredients
Zucchini and Cheese
- 1 cup grated zucchini
- 1 cup hard melty cheese (gruyere, cheddar, parmesan, swiss or a mix)
Instructions
Preparation
- Place a cheesecloth in a bowl and grate the zucchini into it. Then press all the liquid out of the zucchini. Be thorough. The drier the zucchini, the crispier your cheese crisps.
- Grate the cheese and mix well with the zucchini.
- Line a baking sheet with parchment paper and form little humps of about 1 tablespoon of zucchini cheese mix leaving plenty of space in between humps so the cheese can spread.
- Place the baking sheet in the top third of the oven under the broiler on low and constantly keep an eye on them.
- Once the edges turn brown, remove the baking sheet from the oven and lift the crisps off the sheet by pulling up the parchment paper and placing it on a cooling rack.
- Let the crisps cool for a couple of minutes, then remove from the parchment paper and place on a paper-towel-lined plate so it can absorb the excess fat and become even crispier.


Leave a Reply